How to Get the Size of the Document Without Version in SharePoint using PowerShell Script – Client-Side Object Model

Sathish Nadarajan
 
Solution Architect
March 13, 2018
 
Rate this article
 
Views
3306

In the earlier article, we saw, how to get the size using SSOM. But in recent times, customers are interested in CSOM rather than SSOM.

The specific reason behind this could be, if the Content DB is not properly planned/configured, the executing a SSOM Power shell Script can cause a Content DB lock. Hence, if there is a huge Content DB, then always prefer the CSOM rather than SSOM, though the SSOM is having much more performance advantages.

The same piece of SSOM code runs much faster than CSOM code. But CSOM will not lock the DBs.

Hence, the same functionality, the below code is the equivalent CSOM script. But in CSOM, we cannot find the size of each version. At least as of now I guess.

The below code will get the Size of the Documents within a document library. The size is the final version size.

 cls
 
 Import-Module   'C:SATHISHPRACTICE SOURCE CODESOffice365.ConsolepackagesMicrosoft.SharePointOnline.CSOM.16.1.6420.1200libnet45Microsoft.SharePoint.Client.dll'
 Import-Module   'C:SATHISHPRACTICE SOURCE CODESOffice365.ConsolepackagesMicrosoft.SharePointOnline.CSOM.16.1.6420.1200libnet45Microsoft.SharePoint.Client.Runtime.dll'
 
 #Mysite URL
 $site = 'https://sppalsmvp.sharepoint.com/sites/DeveloperSite/'
 
 #Admin User Principal Name
 $admin = 'sathish@sppalsmvp.OnMicrosoft.Com'
 
 #Get Password as secure String
 $password = Read-Host 'Enter Password' -AsSecureString
 
 #Get the Client Context and Bind the Site Collection
 $context = New-Object Microsoft.SharePoint.Client.ClientContext($site)
 
 #Authenticate
 $credentials = New-Object Microsoft.SharePoint.Client.SharePointOnlineCredentials($admin , $password)
 $context.Credentials = $credentials
 
 $list = $context.Web.Lists.GetByTitle('D1')
 $context.Load($list)
 $context.ExecuteQuery()
 
 if ($list.BaseType -eq “DocumentLibrary”) 
         {
             $docSize=0
             $camlQuery = New-Object Microsoft.SharePoint.Client.CamlQuery
             $camlQuery.ViewXml ="<View Scope='RecursiveAll' />";
             $allItems=$list.GetItems($camlQuery)
             $context.Load($allItems)
             $context.ExecuteQuery()
             
             foreach($item in $allItems)
             {
                 if($item.FileSystemObjectType -eq "File")
                 {
                     $file = $item.File
                     $fItem = $file.ListItemAllFields
                     $context.Load($file)
                     $context.Load($fItem)
                                    
                     $context.ExecuteQuery()    
                     $docSize=$fItem["File_x0020_Size"]/1048576
                    
                       
                     #Write-Host "Filename" $fItem["FileLeafRef"].Split('.')[0]                  
                     Write-Host $list.Title + ',' + $file.ServerRelativeUrl  + ',' + $fItem["FileLeafRef"].Split('.')[0] + ',' + $docSize


                 }
             }
         }
 

Happy Coding,

Sathish Nadarajan.

Author Info

Sathish Nadarajan
 
Solution Architect
 
Rate this article
 
Sathish is a Microsoft MVP for SharePoint (Office Servers and Services) having 15+ years of experience in Microsoft Technologies. He holds a Masters Degree in Computer Aided Design and Business ...read more
 

How to redirect different page on Save button click on SharePoint Forms using client side script

Ahamed Fazil Buhari
 
Senior Developer
January 21, 2018
 
Rate this article
 
Views
12890

Hello everyone, in this article we will how we can change the default behaviour of buttons available in SharePoint OOTB forms (Non-custom). We achieve this in different ways; below you can find simple and straight way. Here we used JQuery and OOTB Script Editor Web part on the form page. Follow the below steps,

Step 1: Go to Edit page in the form where you would like to implement this,


image

Step 2: Add Script Editor Web part as shown below.


image

Step 3: Insert the below script in the Script Editor web part. The below script is for New Form which has Save and Cancel buttons.

 <script src="https://ajax.googleapis.com/ajax/libs/jquery/3.2.1/jquery.min.js"></script>
 <script>
 $(document).ready(function(){
     var targetURL = 'YOUR URL';
     //For Cancel Button
   $("input[value='Cancel']").attr("onclick","location.href='" + targetURL +"';");  
 
     //For Save Button
       var saveButton = $("input[value='Save']");
       saveButton.removeAttr("onclick");
       saveButton.click(function() {
             if (!PreSaveItem()) return false;
             if (SPClientForms.ClientFormManager.SubmitClientForm('WPQ2')) return false; 
             
             var oldActionUrl = $('#aspnetForm').attr('action');
             var oldSource = GetUrlKeyValue("Source", true, oldActionUrl);           
             var newActionUrl = oldActionUrl.replace(oldSource, encodeURIComponent(targetURL));
     var elementName = $(this).attr("name");
             WebForm_DoPostBackWithOptions(new WebForm_PostBackOptions(elementName, "", true, "", newActionUrl, false, true));
         });    
 });
 </script>
 

The same script can be used in Edit and Display form, change the input[value=’Close’] for Display form.

By default once you save or edit item, it will be redirected to the respective list in SharePoint. If you don’t want that to happen and still if you want to use the same OOTB form then you can make use of the above script which helps in redirecting to different page once Save or Cancel button is clicked. I hope this article is useful for the readers. Thank you


Happy Coding

Ahamed

Author Info

Ahamed Fazil Buhari
 
Senior Developer
 
Rate this article
 
Ahamed is a Senior Developer and he has very good experience in the field of Microsoft Technologies, especially SharePoint, Azure, M365, SPFx, .NET and client side scripting - JavaScript, TypeScript, ...read more
 

How to Execute the Client Object Model PowerShell Script and get the Client Context on SharePoint 2010

Sathish Nadarajan
 
Solution Architect
December 29, 2017
 
Rate this article
 
Views
5311

Recently for one of the requirement, we were supposed to write the PowerShell Client Object Model Script to run against SharePoint 2010. We have written a lot of code on the SSOM for SP2010 and CSOM for SP2013 or above. But, for the first time, met with this strange requirement stating CSOM Script for SP2010. Though it does not support few functionalities, we can achieve some of the basic functionalities with this.

In this article, we are going to see, how to add the Client DLL and how to create the client context. In the upcoming articles, let us see, how to do various functionalities using CSOM PowerShell in SP2010.

 
 cls
 
  
 $Host.UI.RawUI.WindowTitle = "-- Get Site Context --"
 
 $StartDate = Get-Date
 Write-Host -ForegroundColor White "------------------------------------"
 Write-Host -ForegroundColor White "| Get Site Context  |"
 Write-Host -ForegroundColor White "| Started on: $StartDate |"
 Write-Host -ForegroundColor White "------------------------------------"
 
 $LogTime = Get-Date -Format yyyy-MM-dd_hh-mm
 
 ################# Set the Current Path as Execution Path ####################
 
 $scriptBase = split-path $SCRIPT:MyInvocation.MyCommand.Path -parent
 Set-Location $scriptBase
 
 ############# set the Error Preference ################
 
 $ErrorActionPreference = "SilentlyContinue"
 
 
 # Create Log File Folder
 if(!(TEST-PATH ".Logs-$LogTime")) 
 {
    NEW-ITEM ".Logs-$LogTime" -type Directory
 }
 
 # Create Report File Folder
 if(!(TEST-PATH ".Reports-$LogTime")) 
 {
    NEW-ITEM ".Reports-$LogTime" -type Directory
 }
 
 # Assign the Log and Progress Files
 $TranscriptFile = ".Logs-$LogTimeGetSiteInfo.Transcript.rtf"
  
 
 try{
   stop-transcript|out-null
 }
 catch [System.InvalidOperationException]{}
 
 start-transcript $TranscriptFile
 
 function AddCSOM(){
      #Load SharePoint client dlls 
      $a = [System.Reflection.Assembly]::LoadFile(    "$scriptBaseClientLibrariesMicrosoft.SharePoint.Client.dll") 
      $ar = [System.Reflection.Assembly]::LoadFile(    "$scriptBaseClientLibrariesMicrosoft.SharePoint.Client.Runtime.dll") 
      
      if( !$a ){
          $a = [System.Reflection.Assembly]::LoadWithPartialName(        "Microsoft.SharePoint.Client")
      }
      if( !$ar ){
          $ar = [System.Reflection.Assembly]::LoadWithPartialName(        "Microsoft.SharePoint.Client.Runtime")
      }
      
      if( !$a -or !$ar ){
          throw         "Could not load Microsoft.SharePoint.Client.dll or Microsoft.SharePoint.Client.Runtime.dll"
      }
      
      
      #Add overload to the client context.
      #Define new load method without type argument
      $csharp =     "
       using Microsoft.SharePoint.Client;
       namespace SharepointClient
       {
           public class PSClientContext: ClientContext
           {
               public PSClientContext(string siteUrl)
                   : base(siteUrl)
               {
               }
               // need a plain Load method here, the base method is a generic method
               // which isn't supported in PowerShell.
               public void Load(ClientObject objectToLoad)
               {
                   base.Load(objectToLoad);
               }
           }
       }"
      
      $assemblies = @( $a.FullName, $ar.FullName,     "System.Core")
      #Add dynamic type to the PowerShell runspace
      Add-Type -TypeDefinition $csharp -ReferencedAssemblies $assemblies
 }
 
 AddCSOM
 
 $credentials = Get-Credential
 
  
 cls
 
  
     $SubSiteURL = "https://sppalsmvp.sharepoint2010.com/sites/myteamsite"
 
     Write-Host "Processing the Site - " $SubSiteURL  -Foreground Yellow
 
     $context = New-Object SharepointClient.PSClientContext($_.SubSiteURL)
     $context.Credentials = $credentials


     $web = $context.Web
      
     $context.Load($web)
      
     $context.Load($web.Lists)
     
     $context.ExecuteQuery() 
 
      Write-Host "Web Title " $web.Title


 Write-Host "Process Completed..  Press Enter to Exit" -ForeGroundColor Green
 
  try{
   stop-transcript|out-null
 }
 catch [System.InvalidOperationException]{}       
 

The above code will write the Web Title by CSOM.


DOWNLOAD THE DLLs HERE


Happy Coding,

Sathish Nadarajan.

Category : CSOM, PowerShell, SharePoint

Author Info

Sathish Nadarajan
 
Solution Architect
 
Rate this article
 
Sathish is a Microsoft MVP for SharePoint (Office Servers and Services) having 15+ years of experience in Microsoft Technologies. He holds a Masters Degree in Computer Aided Design and Business ...read more
 

Client Context is Coming as Null on the Host Web Remote Event Receivers in SharePoint Office 365

Sathish Nadarajan
 
Solution Architect
August 9, 2017
 
Rate this article
 
Views
5356

Many developers have faced this issue, whenever we deal with the remote event receiver. I have faced this long back and after sometime, again I was creating an event receiver, with the App Only Permission, then I again met with the same exception. – Client Context will be NULL.

As part of investigating this again, I found some interesting facts like, through fiddler logs, it says that “401 error” while trying to obtain the SharePoint client context. But, I Use the ClientContext Object, then immediately it throws, that “Object Reference not set to an instance”.

So, there is a mystery behind the authentication and the Remote Event Receivers in SharePoint. Basically, there are two types of Permissions, we would have seen. Both has the advantages and limitations on its own.

1. User + App Only token.

2. App Only token.

A Check box decides this on the App Manifest.xml

clip_image002

On the XML File, it will looks like,

clip_image004

For Our Event Receivers to work with the AppOnly Permission, the default code snippet generated by the Visual Studio will not work.

 public void ProcessOneWayEvent(SPRemoteEventProperties properties)
         {
             using (ClientContext clientContext = TokenHelper.CreateRemoteEventReceiverClientContext(properties))
             {
                 if (clientContext != null)
                 {
                     clientContext.Load(clientContext.Web);
                     clientContext.ExecuteQuery();
                 }
             }
 
              
         }
 

Here on the above code, the ClientContext will always be null. Hence, we are not able to proceed. For this, there is a workaround. But eventually, the work around has is biggest draw back as well. But we can have a workaround for that also.

 public void ProcessOneWayEvent(SPRemoteEventProperties properties)
         {
             
             string webUrl = properties.ItemEventProperties.WebUrl;
 
             Uri webUri = new Uri(webUrl);
 
             string realm = TokenHelper.GetRealmFromTargetUrl(webUri);
             string accessToken = TokenHelper.GetAppOnlyAccessToken(TokenHelper.SharePointPrincipal, webUri.Authority, realm).AccessToken;
             using (var clientContext = TokenHelper.GetClientContextWithAccessToken(webUrl, accessToken))
             {
 // DO YOUR ACTION HERE.  A SAMPLE ACTION IS SHOWN BELOW.
                 clientContext.Load(clientContext.Web);
                 clientContext.ExecuteQuery();
 
                 string title = properties.ItemEventProperties.AfterProperties["Title"].ToString();
 
                 List lstDemoeventReceiver = clientContext.Web.Lists.GetByTitle(properties.ItemEventProperties.ListTitle);
                 ListItem itemDemoventReceiver = lstDemoeventReceiver.GetItemById(properties.ItemEventProperties.ListItemId);
 
                 itemDemoventReceiver["Column1"] = "Updated Value : " + title;
                 itemDemoventReceiver.Update();
                 clientContext.ExecuteQuery();
             }
         }
 

So, now the advantage is, with the AppOnly token, we are able to get the client context in the Remote Event Receiver.

In the same time, the disadvantage is, in the above piece of code, I am updating another column on the same list item. If you have a look on the screen, then the Modified By is coming as “SharePoint APP”. It should not be like that.

clip_image006

So, for this, we need to do a work around like, before updating the record, take the current user and then update that as well, wherever required. It is a simple work around, which we can easily do.

Happy Coding,

Sathish Nadarajan.

Author Info

Sathish Nadarajan
 
Solution Architect
 
Rate this article
 
Sathish is a Microsoft MVP for SharePoint (Office Servers and Services) having 15+ years of experience in Microsoft Technologies. He holds a Masters Degree in Computer Aided Design and Business ...read more
 

How to Enable Multi Language Settings in a SharePoint Office 365 Site Programmatically Using C# Client Site Object Model (CSOM)

Sathish Nadarajan
 
Solution Architect
July 7, 2017
 
Rate this article
 
Views
4287

As I said earlier articles, during the deployment we need to do a series of actions. As part of that, let us see, how to enable the multi-language settings and select the languages.

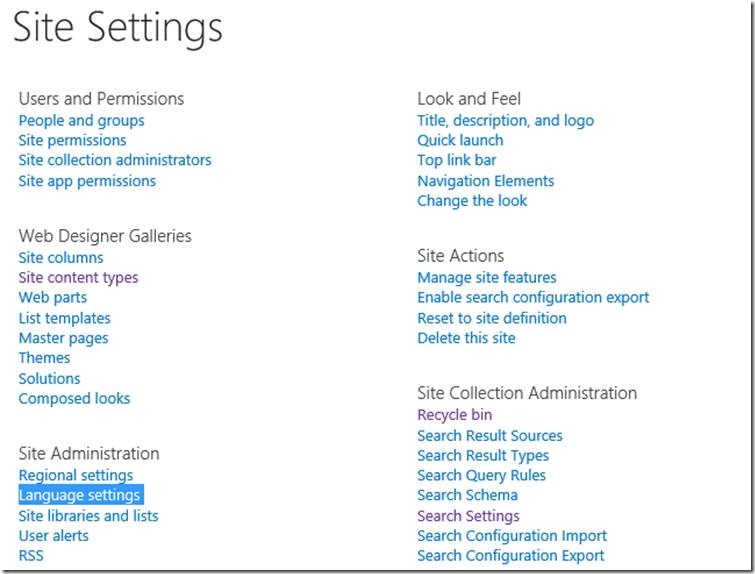
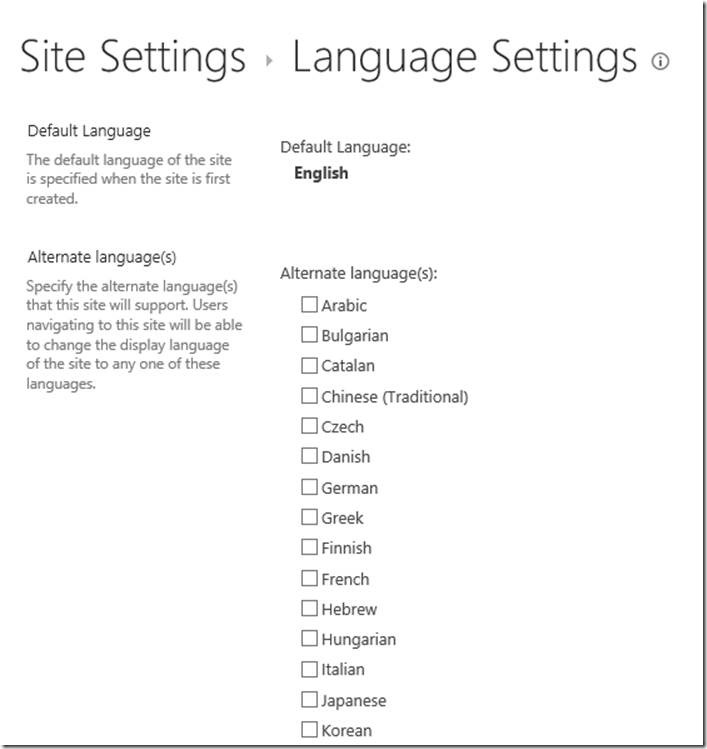
The settings in the screen is available on the Site Settings.

clip_image002

clip_image004

Now, let us see the code, which will enable and select few languages as alternate languages.

 using Microsoft.SharePoint.Client;
 
 namespace Office365.Console
 {
     class Program
     {
         static void Main(string[] args)
         {
             ConfigureSearchCentreURL();
         }
 
         public static void ConfigureSearchCentreURL()
         {
             OfficeDevPnP.Core.AuthenticationManager authMgr = new OfficeDevPnP.Core.AuthenticationManager();
 
             string sourceSiteUrl = "https://******.sharepoint.com/sites/communitysite";
             
             string userName = "Sathish@******.onmicrosoft.com";
             string password = "******";
 
             var clientContext = authMgr.GetSharePointOnlineAuthenticatedContextTenant(sourceSiteUrl, userName, password);
 
             Web web = clientContext.Web;
             clientContext.Load(web);
 
             web.IsMultilingual = true;
             web.AddSupportedUILanguage(1033); // English
             web.AddSupportedUILanguage(1031); // German
             web.AddSupportedUILanguage(1036); // French
             web.AddSupportedUILanguage(1046); // Portugese (Brazil)
             web.AddSupportedUILanguage(1049); // Russian
             web.AddSupportedUILanguage(2052); // Chinese (Simplified)
             web.AddSupportedUILanguage(3082); // Spanish
 
             web.Update();
 
             clientContext.ExecuteQuery();
         }
 
     }
 }
 

Happy Coding,

Sathish Nadarajan.

Author Info

Sathish Nadarajan
 
Solution Architect
 
Rate this article
 
Sathish is a Microsoft MVP for SharePoint (Office Servers and Services) having 15+ years of experience in Microsoft Technologies. He holds a Masters Degree in Computer Aided Design and Business ...read more
 

How to Configure Search Centre URL in a SharePoint Office 365 Site Programmatically Using C# Client Site Object Model (CSOM)

Sathish Nadarajan
 
Solution Architect
July 6, 2017
 
Rate this article
 
Views
3371

How to Configure Search Centre URL in a SharePoint Office 365 Site Programmatically Using C# Client Site Object Model (CSOM)

Today, we are going to have a look on a small tip, which will be useful during the deployment package. Usually, when we are provisioning a site, we need to configure the corresponding search centre URL for that site. But, when we try to automate the deployment process, we need C# code for each and every small piece of work. In that aspect, let us see how to configure the search centre URL here.

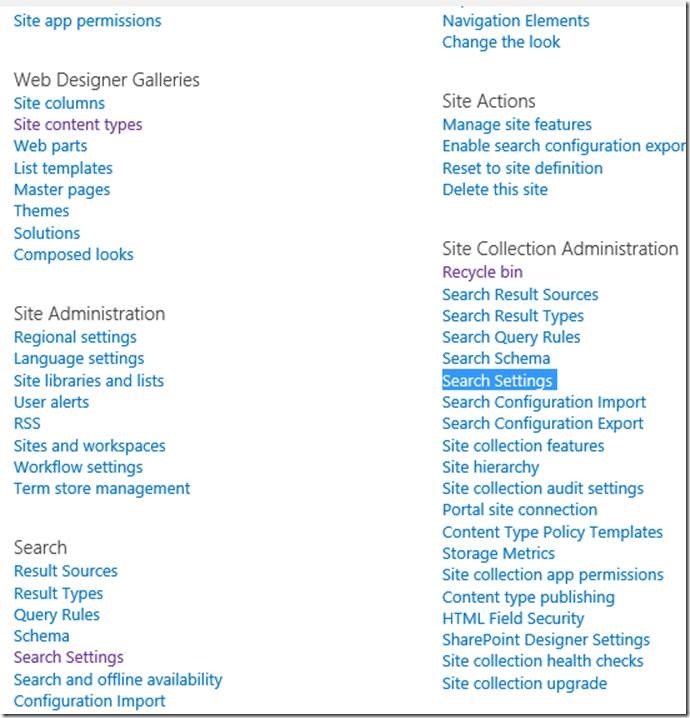
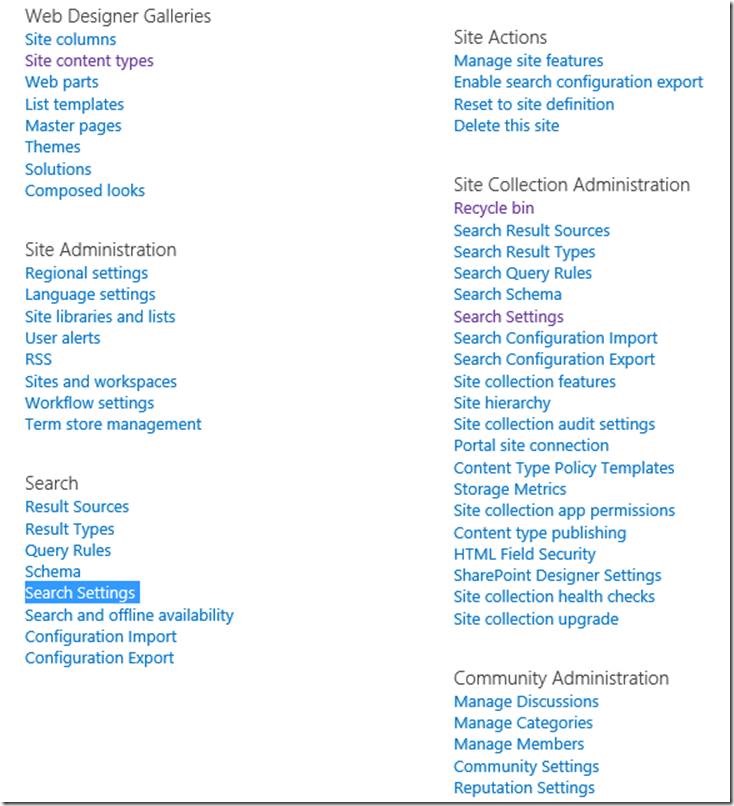
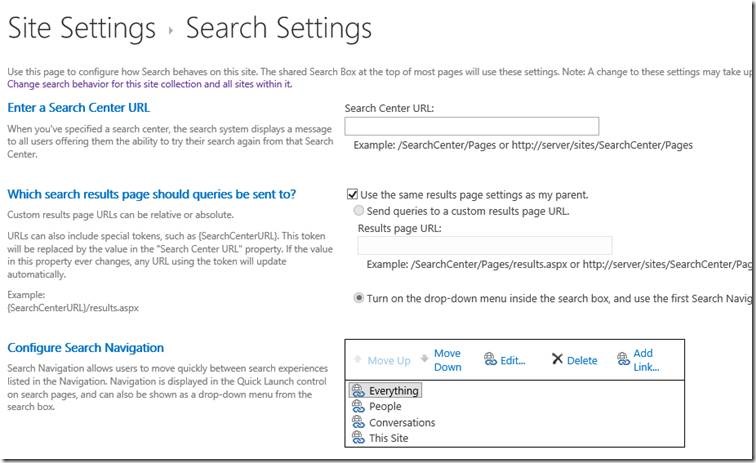
Usually, the Search URL at the site collection level should be set in the below screen.

1. Go to Site Settings.

clip_image002

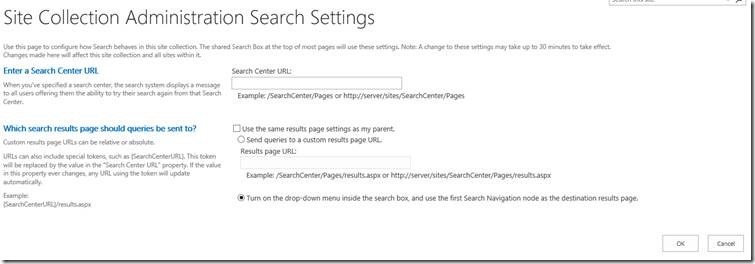
2. Click on the Search Settings.

clip_image004

3. By default, the Search Centre URL will be empty.

4. We can type our Search Site here and click on OK.

5. Now, let us see how to do that programmatically.

 using Microsoft.SharePoint.Client;
 
 namespace Office365.Console
 {
     class Program
     {
         static void Main(string[] args)
         {
             ConfigureSearchCentreURL();
         }
 
         public static void ConfigureSearchCentreURL()
         {
             OfficeDevPnP.Core.AuthenticationManager authMgr = new OfficeDevPnP.Core.AuthenticationManager();
 
             string sourceSiteUrl = "https://*****.sharepoint.com/sites/communitysite";
             
             string userName = "Sathish@*****.onmicrosoft.com";
             string password = "*********";
 
             var clientContext = authMgr.GetSharePointOnlineAuthenticatedContextTenant(sourceSiteUrl, userName, password);
 
             Web web = clientContext.Web;
             clientContext.Load(web);
 
             //web.SetWebSearchCenterUrl("https:// *****.sharepoint.com/sites/searchcentresiteurl");
             web.SetSiteCollectionSearchCenterUrl("https:// *****.sharepoint.com/sites/searchcentresiteurl");
 
             web.Update();
 
             clientContext.ExecuteQuery();
         }
 
     }
 }
 

6. The above piece of code will be updating at the site collection search centre URL.

7. If we want to update the Web Level URL, then the commented line will be helpful.

clip_image006

8. Click on the Site Level Search Settings.

clip_image008

Happy Coding,

Sathish Nadarajan.

Author Info

Sathish Nadarajan
 
Solution Architect
 
Rate this article
 
Sathish is a Microsoft MVP for SharePoint (Office Servers and Services) having 15+ years of experience in Microsoft Technologies. He holds a Masters Degree in Computer Aided Design and Business ...read more
 

Build a simple client-side MVC app with RequireJS

Tarun Kumar Chatterjee
 
Net – Technology Specialist
June 26, 2017
 
Rate this article
 
Views
3200

RequireJS is an implementation of AMD (Asynchronous Module Definition), an API for declaring modules and loading them asynchronously on the fly when they’re needed.

We instantly have a problem, our custom jQuery plugins will not work, as jQuery itself has not be loaded yet. Sure we could move the jQuery script tag to be before the custom jQuery plugins, which would indeed fix the problem this once. This is however a very isolated small use case, which is not really the norm on large scale applications, where we may have many many related files which all have dependencies. This is where RequireJs can help.

Using RequireJs we are able to specify things like:

· Define a module

· Require a module 

· The modules dependencies (via a RequireJs config called  shim)

· The module paths 

require() vs. define():

We can use both require() and define() to load module dependencies. The require() function is used to run immediately, where as define() is used to define modules which may be used from multiple locations.

We can see that we are actually configuring RequireJs for certain things, such as:

· BaseUrl: Specifies the base path for all the scripts, you can still use RequireJs with relative paths, but this is its base path

· Paths : Is a map of named paths where we specify a well known name and a path

· Shim: Is a map of files, and their dependecies. What this does is that is gives a hint to RequireJs about the required module dependencies such that RequireJs will then know to load them in the correct order. Remember that RequireJs uses a technique which means modules are loaded asychronously. It can be seen from the example above that “jquery.appender” and “jquery.textReplacer” are dependent on jQuery. As such RequireJs will load that first.It may seem that we are just swapping the evils of having the correct javascript imports in the html in the correct order for this, but what we do get from RequireJs is that modules are loaded asychronously

Let me create a simple asp.net web application and implement the RequireJS and the details are as follows:

Download the Jquery and AngularJS from nuget by using the below commands

PM> Install-Package jQuery

PM> Install-Package angularjs

PM> Install-Package RequireJS

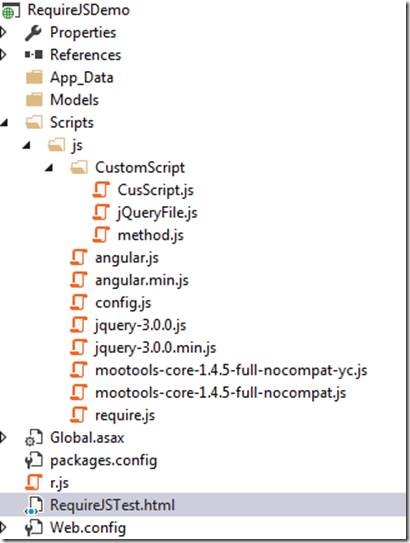
Now add some custom scripts, following are the Scripts hierarchy snapshots and codes:

clip_image002

Config.js code:

 requirejs.config({
     
     baseUrl: 'Scripts/js',
     paths: {
         angular: 'angular.min',
         jquery: 'jquery-3.0.0.min',
         mootools: 'mootools-core-1.4.5-full-nocompat',
         methods: 'CustomScript/method'
     }
     //,shim: {
     //        "angular": { deps: ["mootools"] }
     //}
 })
 

JQueryFile.js code:

 define( ['jquery', 'methods'], function ($, methods) {
     
     //$('body').html('Hello, from other side !!!!');
     $('#clickMe').click(function () {
         methods.changeHTML('Clicked');
         methods.showAlert('Clicked');
 
         require(['CustomScript/CusScript']);
     })
 });  
 

Method.js code:

 define(['jquery','angular'], function ($,angular) {
     var methods = {};
 
     methods.changeHTML = function(argument)
     {
         $('body').html(argument);
     }
     methods.showAlert = function (argument) {
         alert(argument);
     }
     return methods;
 }); 
 

CusScript.js code:

 define(['mootools'], function (mootools) {
 });
 

Next to create RequireJSTest.html to render the data

 <!DOCTYPE html>
 <html>
 <head>
     <title></title>
 	<meta charset="utf-8" />
     
 </head>
 <body>
    <button id="clickMe" >Asynchronous Module Defination</button>
     <script data-main="Scripts/js/config" src="Scripts/js/require.js"></script>
     <script>
         alert('before required keyword')
         require(['config'], function () {
             require(['CustomScript/jQueryFile']);
         });
     </script>
 </body>
 </html>
 

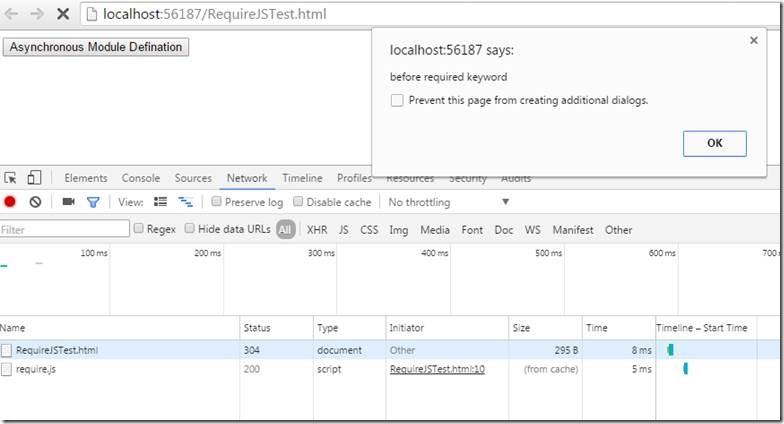
Now build the application and browse RequireJSTest.html page

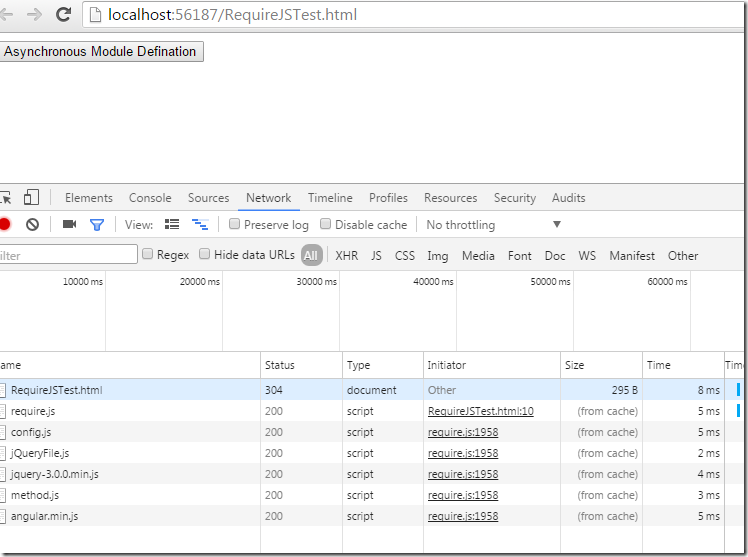
Before requirejs to load the config file

clip_image004

Click on Ok, it will go to load ‘config’ and ‘CustomScript/jQueryFile’. Within the ‘CustomScript/jQueryFile we have the reference of method.js. So, it was loaded.

But we can observe that ‘CustomScript/CusScript’ has not been loaded. Click on the “Asynchronous Module Definition” button will call require([‘CustomScript/CusScript’]); to load ‘CustomScript/CusScript’

clip_image005

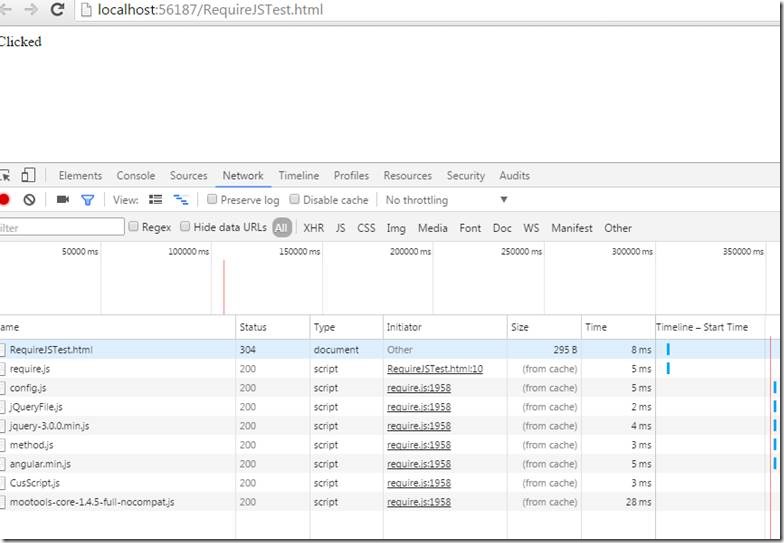
So, let’s click on the button, it will give you an alert. Click on OK, will load ‘CustomScript/CusScript’. As ‘CustomScript/CusScript’ has the reference of ‘mootools’, so it will also be loaded asynchronously.

clip_image007

Now let’s enable the dependency, considering “mootools” is having the dependency on “angular”. So, change the config.js file

 requirejs.config({
     
     baseUrl: 'Scripts/js',
     paths: {
         angular: 'angular.min',
         jquery: 'jquery-3.0.0.min',
         mootools: 'mootools-core-1.4.5-full-nocompat',
         methods: 'CustomScript/method'
     }
     ,shim: {
             "angular": { deps: ["mootools"] }
     }
 })
 

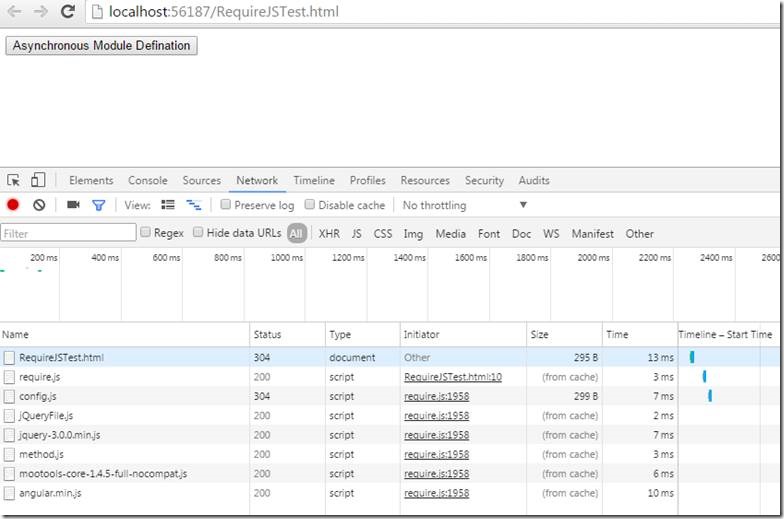
Now run the application again, we can see before clicking on “Asynchronous Module Definition” button mootools js has been loaded. As “mootools” has the dependency on “angular”, mootools” will be loaded first than “angular”. We can check the order of script in below snapshot.

clip_image009

Hope, this article help you to have some basic ideas on RequireJS and its implementation. In next article we will see how RequireJS can be used for Module Optimization.

Happy Coding

Tarun Kumar Chatterjee

Author Info

Tarun Kumar Chatterjee
 
Net – Technology Specialist
 
Rate this article
 
Tarun has been working in IT Industry for over 12+ years. He holds a B-tech degree. He is passionate about learning and sharing the tricks and tips in Azure, .Net ...read more
 

How to Create List, Add Site Columns and Add Content Types in SharePoint Office 365 using C# CSOM Patterns and Practices

Sathish Nadarajan
 
Solution Architect
May 24, 2017
 
Rate this article
 
Views
9659


As part of our PNP series, let us see how to create the List in Office 365 using Patterns and Practices (PNP) and add few columns and Content Types to that list dynamically.

Basically, these things will be very useful, when preparing for an end to end deployment. Sometimes, the requirements can be the site itself will be generated dynamically. At that time, we need to create all the lists, master pages, content types etc., as part of the site creation process itself. During those kind of scenarios, the below code will be very handy.

The Code snippets are very straight forward, hence let us see the code directly.

1. Create the List

 public static void CreateList()
         {
             OfficeDevPnP.Core.AuthenticationManager authMgr = new OfficeDevPnP.Core.AuthenticationManager();
 
             string siteUrl = "https://*******.sharepoint.com/sites/communitysite";
             string userName = "Sathish@**********.onmicrosoft.com";
             string password = "************";
 
             using (var clientContext = authMgr.GetSharePointOnlineAuthenticatedContextTenant(siteUrl, userName, password))
             {
                 Web web = clientContext.Web;
                 clientContext.Load(web);
                 clientContext.Load(web.Lists);
                 clientContext.ExecuteQueryRetry();
                 List list = null;
                 if (!clientContext.Web.ListExists("DemoList"))
                 {
                     list = clientContext.Web.CreateList(ListTemplateType.GenericList, "DemoList", false, true, string.Empty, true);
                 }
                 else
                 {
                     list = web.Lists.GetByTitle("DemoList");
                 }
                 clientContext.Load(list);
                 clientContext.ExecuteQuery();
             }
         }
 

2. Add Content Types to List

 public static void AddContentTypeToList()
         {
             OfficeDevPnP.Core.AuthenticationManager authMgr = new OfficeDevPnP.Core.AuthenticationManager();
 
             string siteUrl = "https://*******.sharepoint.com/sites/communitysite";
             string userName = "Sathish@*********.onmicrosoft.com";
             string password = "***********";
 
             using (var clientContext = authMgr.GetSharePointOnlineAuthenticatedContextTenant(siteUrl, userName, password))
             {
                 Web web = clientContext.Web;
                 clientContext.Load(web);
                 clientContext.Load(web.Lists);
                 clientContext.ExecuteQueryRetry();
                 List list = null;
 
                 list = web.Lists.GetByTitle("DemoList");
 
                 clientContext.Load(list);
                 clientContext.Load(list.ContentTypes);
                 clientContext.ExecuteQuery();
 
                 if (!list.ContentTypeExistsByName("DemoContentType"))
                 {
                     list.AddContentTypeToListByName("DemoContentType");
                 }
 
                 list.Update();
 
                 clientContext.Load(list);
                 clientContext.ExecuteQuery();
             }
         }
 

3. Add Fields to the List

 public static void AddFields()
         {
             OfficeDevPnP.Core.AuthenticationManager authMgr = new OfficeDevPnP.Core.AuthenticationManager();
 
             string siteUrl = "https://***.sharepoint.com/sites/communitysite";
             string userName = "Sathish@********.onmicrosoft.com";
             string password = "**********";
 
             using (var clientContext = authMgr.GetSharePointOnlineAuthenticatedContextTenant(siteUrl, userName, password))
             {
                 Web web = clientContext.Web;
                 clientContext.Load(web);
                 clientContext.Load(web.Lists);
                 clientContext.Load(web.Fields);
                 clientContext.ExecuteQueryRetry();
                 
                 List list = web.Lists.GetByTitle("DemoList");
 
                 clientContext.Load(list);
                 clientContext.Load(list.Fields);
                 clientContext.ExecuteQuery();
 
                 Field field = web.Fields.GetByInternalNameOrTitle("DemoField");
 
                 list.Fields.Add(field);
 
                 list.Update();
 
                 clientContext.Load(list);
                 clientContext.ExecuteQuery();
             }
         }


Happy Coding,

Sathish Nadarajan.

Author Info

Sathish Nadarajan
 
Solution Architect
 
Rate this article
 
Sathish is a Microsoft MVP for SharePoint (Office Servers and Services) having 15+ years of experience in Microsoft Technologies. He holds a Masters Degree in Computer Aided Design and Business ...read more
 

Provision Master Pages and the other files in SharePoint Office 365 using Patterns and Practice C# CSOM

Sathish Nadarajan
 
Solution Architect
May 11, 2017
 
Rate this article
 
Views
3130

Some time back, we saw how to provision the site columns and content types in an OLD article. But, along with that, we can upload the Master Pages, CSS, JS files to the SharePoint Site as part of provisioning. In this, the same piece of code, with the updated Provisioning XML is shown below.

 using Microsoft.SharePoint.Client;
 using OfficeDevPnP.Core.Framework.Provisioning.Connectors;
 using OfficeDevPnP.Core.Framework.Provisioning.Providers.Xml;
 
 namespace Office365.Console
 {
     class Program
     {
         static void Main(string[] args)
         {
             ProvisionMasterPagesAndJSFiles();
         }
 
         public static void ProvisionMasterPagesAndJSFiles()
         {
             OfficeDevPnP.Core.AuthenticationManager authMgr = new OfficeDevPnP.Core.AuthenticationManager();
 
             string siteUrl = "https://*******.sharepoint.com/sites/communitysite";
             string userName = "Sathish@*********.onmicrosoft.com";
             string password = "************";
 
             string ResourcesDirectory = @"C:SATHISHPRACTICE SOURCE CODESOffice365.ConsoleOffice365.ConsoleResources";
             string ResourcesFile = "ProvisioningTemplate.xml";
 
             using (var clientContext = authMgr.GetSharePointOnlineAuthenticatedContextTenant(siteUrl, userName, password))
             {
                 Web web = clientContext.Web;
                 clientContext.Load(web);
                 clientContext.ExecuteQueryRetry();
 
                 var provisioningProvider = new XMLFileSystemTemplateProvider(ResourcesDirectory, string.Empty);
                 var provisioningTemplate = provisioningProvider.GetTemplate(ResourcesFile);
                 provisioningTemplate.Connector.Parameters[FileConnectorBase.CONNECTIONSTRING] = ResourcesDirectory;
 
                 clientContext.Web.ApplyProvisioningTemplate(provisioningTemplate);
                 clientContext.ExecuteQuery();
             }
         }
     }
 }
 

And the Provisioning Template is

 <?xml version="1.0"?>
 <pnp:ProvisioningTemplate ID="Demo.TeamSite" Version="1" xmlns:pnp="http://schemas.dev.office.com/PnP/2015/12/ProvisioningSchema">
 
    <pnp:Files>
 
     <pnp:File Src="MasterPagesMy.seattle.master" Folder="_catalogs/MasterPage" Overwrite="true" />
      <pnp:File Src="JSFilesJavaScript1.JS" Folder="SiteAssetsJS" Overwrite="true" />
   </pnp:Files>
 
 </pnp:ProvisioningTemplate>
 

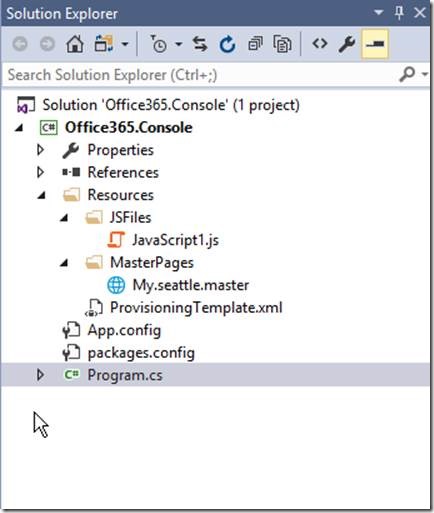
The Solution will be looks like

clip_image002

Happy Coding,

Sathish Nadarajan.

Author Info

Sathish Nadarajan
 
Solution Architect
 
Rate this article
 
Sathish is a Microsoft MVP for SharePoint (Office Servers and Services) having 15+ years of experience in Microsoft Technologies. He holds a Masters Degree in Computer Aided Design and Business ...read more
 

How to Delete a Permission Level in SharePoint Office 365 Programmatically using C# Client Side Object Model (CSOM)

Sathish Nadarajan
 
Solution Architect
April 10, 2017
 
Rate this article
 
Views
3314

In the earlier articles, (CREATE & ASSIGN) we saw how to create and assign the permission levels. In this article, let us see, how to delete a permission level. Usually, this will be required, when we create itself. i.e., Before Create any of the Permission Level, we should validate whether the permission level is already there or not. If it is already there, then based on our requirement, either we can delete and recreate or we can utilize the same. In our case, let us see, how to delete the permission level.

The below code has a Foreach loop to iterate all the RoleDefinitions. Actually that is not required if we know that there is a Role Definition is available. But if we are uncertain about the availability, it is always to use the Foreach.

 namespace Console.Office365
 {
     using Microsoft.SharePoint.Client;
     using System;
     using System.Collections.Generic;
     using System.Linq;
     using System.Text;
     using System.Threading.Tasks;
 
     class Program
     {
         static void Main(string[] args)
         {
             DeletePermissionLevel();
         }
 
         public static void DeletePermissionLevel()
         {
             OfficeDevPnP.Core.AuthenticationManager authMgr = new OfficeDevPnP.Core.AuthenticationManager();
 
             string siteUrl = "https://***.sharepoint.com/sites/communitysite";
             string userName = "Sathish@****.onmicrosoft.com";
             string password = "*************";
 
 
             using (var clientContext = authMgr.GetSharePointOnlineAuthenticatedContextTenant(siteUrl, userName, password))
             {
                 Web web = clientContext.Web;
                 clientContext.Load(web);
                 clientContext.Load(web.AllProperties);
                 clientContext.Load(web.RoleDefinitions);
                 clientContext.ExecuteQueryRetry();
                 var roleDefinitions = web.RoleDefinitions;
 
                 // Delete the Custom Permission Level if Already Exists
                 foreach (var roledefinition in roleDefinitions)
                 {
                     if (roledefinition.Name == "MyPermissionLevelCreatedByCode")
                     {
                         RoleDefinition customOwnersPermissionLevel = web.RoleDefinitions.GetByName("MyPermissionLevelCreatedByCode");
                         customOwnersPermissionLevel.DeleteObject();
                         clientContext.Load(web.RoleDefinitions);
                         clientContext.ExecuteQueryRetry();
                         break;
                     }
                 }


             }
         }
 
     }
 }
 

Happy Coding,

Sathish Nadarajan.

Author Info

Sathish Nadarajan
 
Solution Architect
 
Rate this article
 
Sathish is a Microsoft MVP for SharePoint (Office Servers and Services) having 15+ years of experience in Microsoft Technologies. He holds a Masters Degree in Computer Aided Design and Business ...read more
 

Leave a comment