Creating a PageLayout on a publishing portal is a common requirement through which all of us would have come across. Here let us discuss how to do that on SharePoint 2013 with ContentTypes attached to the PageLayout, using Visual Studio, SharePoint Designer and Design Manager.
Before creating, the PageLayout, we need to create the required site columns and ContentTypes. To do that, let us follow the steps.
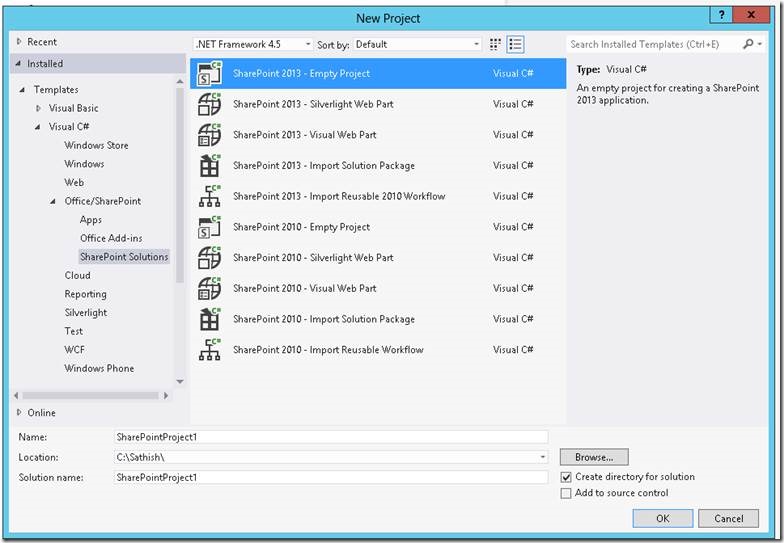
1. Open the Visual Studio for a New Empty SharePoint Project.
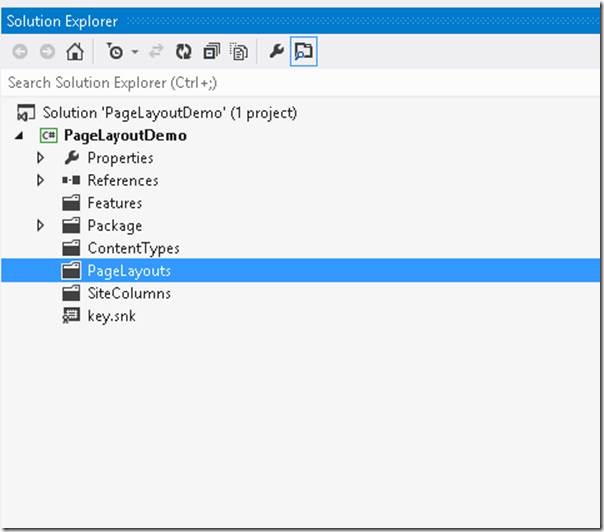
2. Add separate folders for ContentTypes, Site Columns and PageLayouts. The solution would be like this.
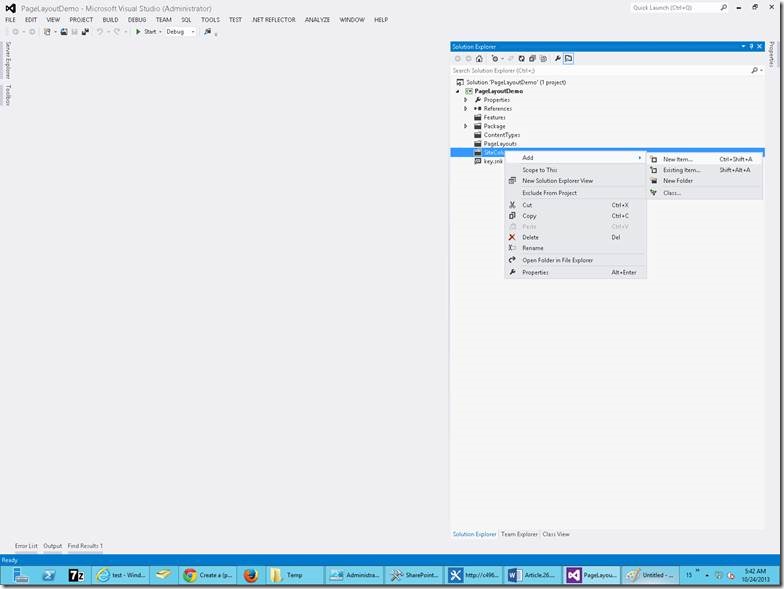
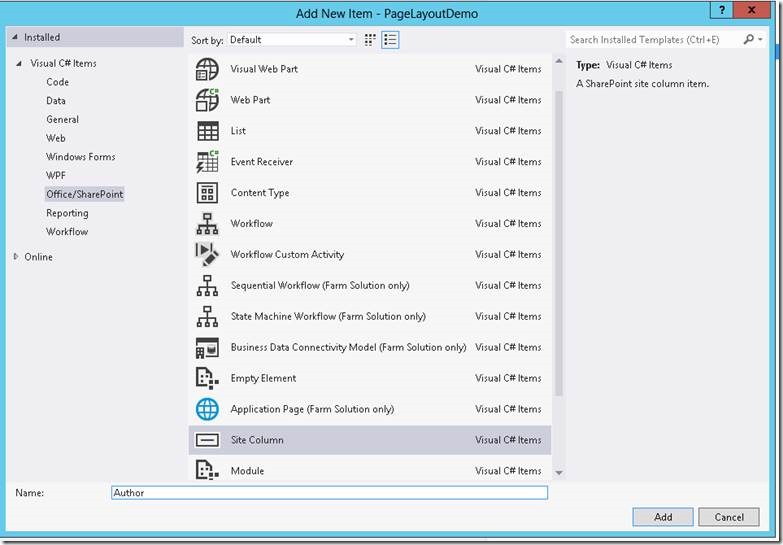
3. Now, add the sitecolumns in the SiteColumns folder.
4. In the same manner, create 2 more site column as Body and Tags. Hence, the 3 site columns will looks like,
 <?xml version="1.0" encoding="utf-8"?>
 <Elements xmlns="http://schemas.microsoft.com/sharepoint/">
   <Field
        ID="{5511034a-38c6-4861-9d00-1633cc111ca3}"
        Name="ArticleAuthor"
        DisplayName="ArticleAuthor"
        Type="Text"
        Required="FALSE"
        Group="PageLayoutDemo">
   </Field>
 </Elements>

 <?xml version="1.0" encoding="utf-8"?>
 <Elements xmlns="http://schemas.microsoft.com/sharepoint/">
   <Field
        ID="{93bb1031-87a2-4f84-bddb-3a9d94d197d1}"
        Name="Body"
        DisplayName="Body"
        Type="Note"
        Required="FALSE"
        RichText="TRUE"
        RichTextMode="FullHtml"
        Group="PageLayoutDemo">
   </Field>
 </Elements>

 <?xml version="1.0" encoding="utf-8"?>
 <Elements xmlns="http://schemas.microsoft.com/sharepoint/">
   <Field
        ID="{9736f0e4-9c76-4ff7-bf33-1547ac53553c}"
        Name="Tags"
        DisplayName="Tags"
        Type="MultiChoice"
        Required="FALSE"
       Group="PageLayoutDemo">
     <CHOICES>
       <CHOICE>SharePoint 2013</CHOICE>
       <CHOICE>ADFS</CHOICE>
       <CHOICE>SharePoint</CHOICE>
       <CHOICE>PageLayoutSample</CHOICE>
       <CHOICE>Visual Studio</CHOICE>
     </CHOICES>
   </Field>
 </Elements>
Here I am referring 3 different data types. You can see the difference on the Type attribute.
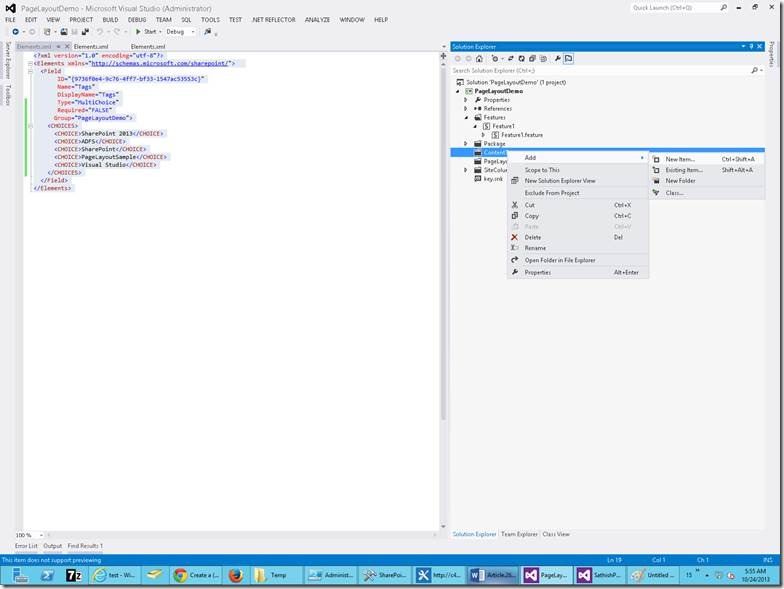
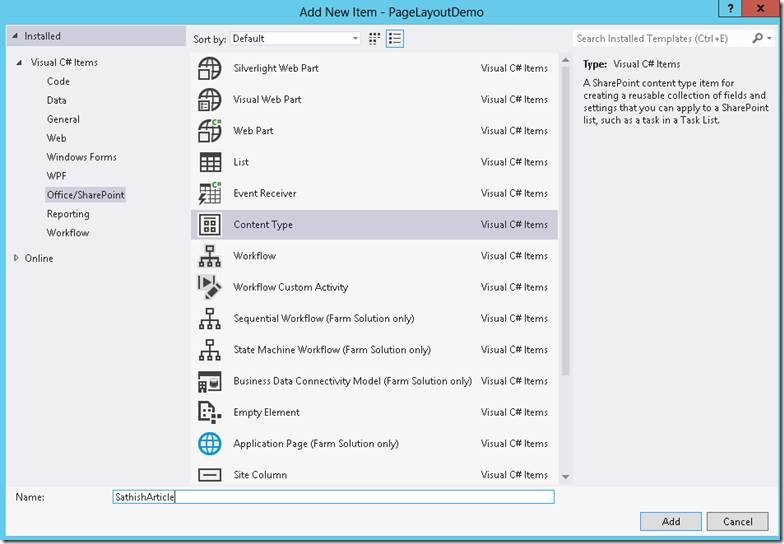
5. Now, let us come to the Content Type creation.
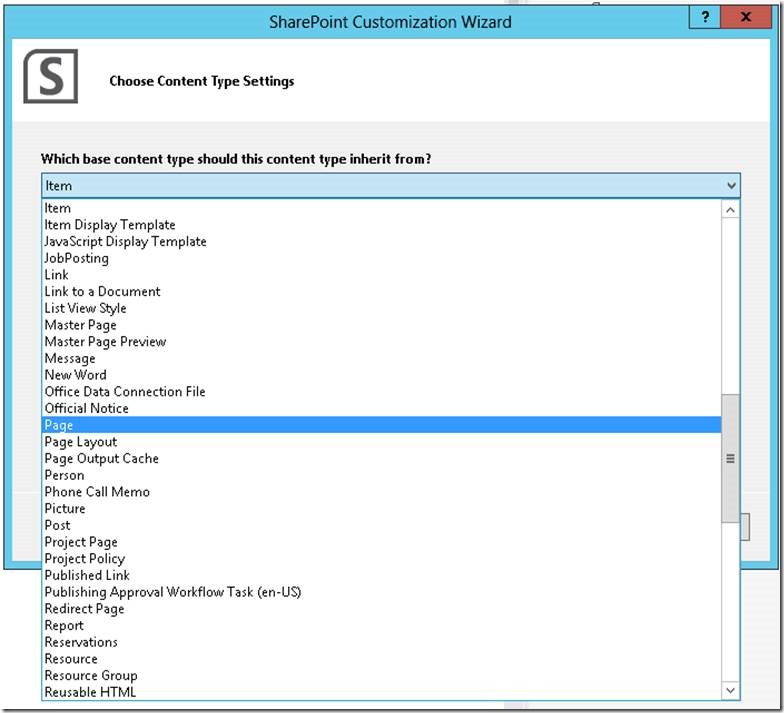
On the next screen, choose the page in the drop down and click Finish.
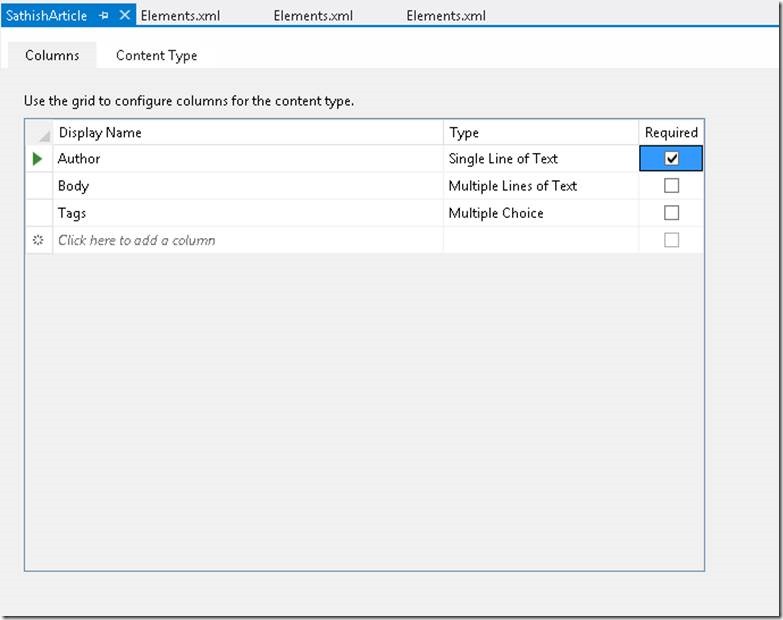
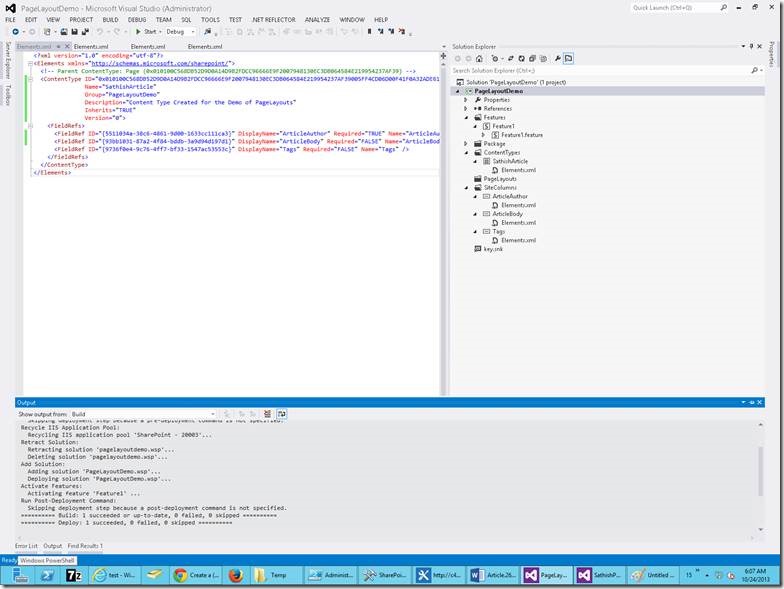
6. Now, the content type got created. We need to add the Site Columns to the Content Type.
7. Now, let us do a deployment and confirm our site columns and Content Types are deployed correctly.
8. Let us see them on the screen.
9. Go to System Settings -> Site Columns (under Web Designer Galleries)
10. In the same manner, go to the Content Types and confirm.
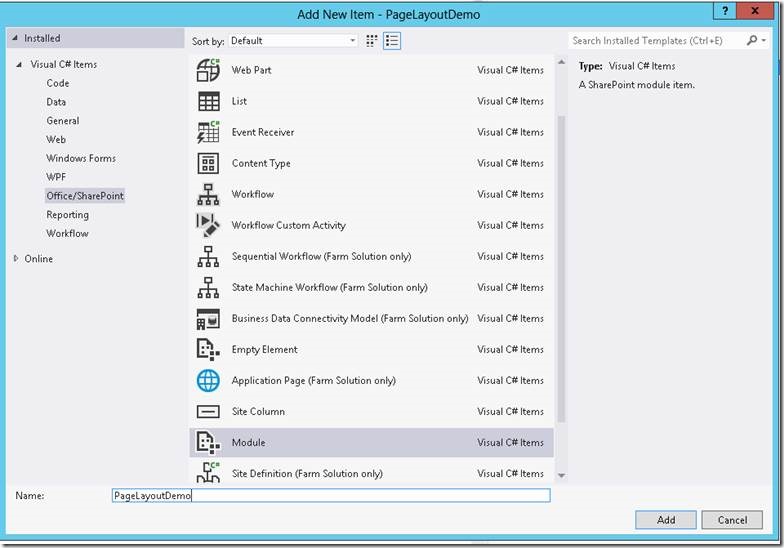
11. Now, let us go back to our Visual Studio and start creating the PageLayout. In the PageLayouts Folder, create a Module.
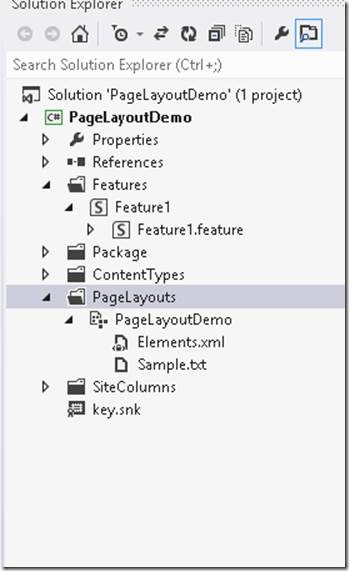
12. We can see a file called Sample.txt.
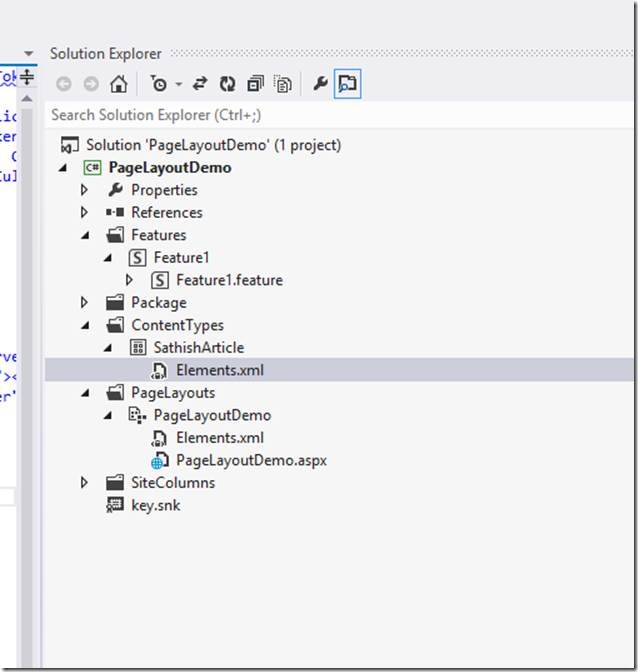
13. Rename it into PageLayoutsDemo.aspx
14. Now, on the aspx page, paste the code below.
 <%@ Page language="C#"   Inherits="Microsoft.SharePoint.Publishing.PublishingLayoutPage,Microsoft.SharePoint.Publishing,Version=15.0.0.0,Culture=neutral,PublicKeyToken=71e9bce111e9429c" %>

 <%@ Register Tagprefix="SharePointWebControls" Namespace="Microsoft.SharePoint.WebControls" Assembly="Microsoft.SharePoint, Version=15.0.0.0, Culture=neutral, PublicKeyToken=71e9bce111e9429c" %>
 <%@ Register Tagprefix="WebPartPages" Namespace="Microsoft.SharePoint.WebPartPages" Assembly="Microsoft.SharePoint, Version=15.0.0.0, Culture=neutral, PublicKeyToken=71e9bce111e9429c" %>
 <%@ Register Tagprefix="PublishingWebControls" Namespace="Microsoft.SharePoint.Publishing.WebControls" Assembly="Microsoft.SharePoint.Publishing, Version=15.0.0.0, Culture=neutral, PublicKeyToken=71e9bce111e9429c" %>
 <%@ Register Tagprefix="PublishingNavigation" Namespace="Microsoft.SharePoint.Publishing.Navigation" Assembly="Microsoft.SharePoint.Publishing, Version=15.0.0.0, Culture=neutral, PublicKeyToken=71e9bce111e9429c" %>

 <asp:Content ContentPlaceholderID="PlaceHolderPageTitle" runat="server">
 	<SharePointWebControls:FieldValue id="PageTitle" FieldName="Title" runat="server"/>
 </asp:Content>
 <asp:Content ContentPlaceholderID="PlaceHolderMain" runat="server">

 <ui>

 <li ><span style="color:red" >Article Author : </span></li><SharePointWebControls:TextField ID="Author" FieldName="5511034a-38c6-4861-9d00-1633cc111ca3" runat="server"></SharePointWebControls:TextField>
 <li ><span style="color:red" >Article Body : </span></li><SharePointWebControls:NoteField ID="Body" FieldName="93bb1031-87a2-4f84-bddb-3a9d94d197d1" runat="server"></SharePointWebControls:NoteField>
 <li ><span style="color:red" >Tags : </span></li><SharePointWebControls:CheckBoxChoiceField ID="Tags" FieldName="9736f0e4-9c76-4ff7-bf33-1547ac53553c" runat="server"></SharePointWebControls:CheckBoxChoiceField>

 </ui>

 </asp:Content>
15. We will see, what is the above code snippet and how we got this on the next post.
16. Now, coming to the element.xml file, by default, the aspx file would have created an entry. But apart from that entry, we need to specify some of the properties for that file. These property will make this aspx as a page layout. Otherwise, this aspx will be deployed. But will not be listed on the Pages Layout listbox on the create page.
 <?xml version="1.0" encoding="utf-8"?>
 <Elements xmlns="http://schemas.microsoft.com/sharepoint/">
   <Module Name="PageLayoutDemo" Url="_catalogs/masterpage" List="116" RootWebOnly="TRUE">

     <File Path="PageLayoutDemoPageLayoutDemo.aspx" Url="PageLayoutDemo/PageLayoutDemo.aspx" Type="GhostableInLibrary" ReplaceContent="TRUE" Level="Published" >
       <Property Name="Title" Value="Page Layout Demo Title"></Property>
       <Property Name="FileLeafRef" Value="PageLayoutDemo.aspx" />
       <Property Name="MasterPageDescription" Value="Page Layout Demo Description"></Property>
       <Property Name="Page Layout Demo Title" Value="PageLayoutDemo" />
       <Property Name="UIVersion" Value="15" />
       <Property Name="PublishingHidden" Value="FALSE" />
       <Property Name="PublishingAssociatedContentType" Value=";#SathishArticle;#0x010100C568DB52D9D0A14D9B2FDCC96666E9F2007948130EC3DB064584E219954237AF39005FF4CD06D00F41F0A32ADE6126A4F9DE;#"></Property>
      <Property Name="HtmlDesignAssociated" Value="FALSE" />
       <Property Name="ContentType" Value="Page Layout" />
       <Property Name="_ModerationStatus" Value="3" />
       <Property Name="FileDirRef" Value="_catalogs/masterpage" />
       <Property Name="FSObjType" Value="0" />

     </File>
   </Module>
 </Elements>
17. The important points to be noted here are
Url="_catalogs/masterpage"
– This describes that our file will be deployed under this folder.
<Property Name="PublishingAssociatedContentType" Value=";#SathishArticle;#0x010100C568DB52D9D0A14D9B2FDCC96666E9F2007948130EC3DB064584E219954237AF39005FF4CD06D00F41F0A32ADE6126A4F9DE;#"></Property>– Name of the Content type and the ID of the Content Type
18. With this, let us deploy and verify the same.
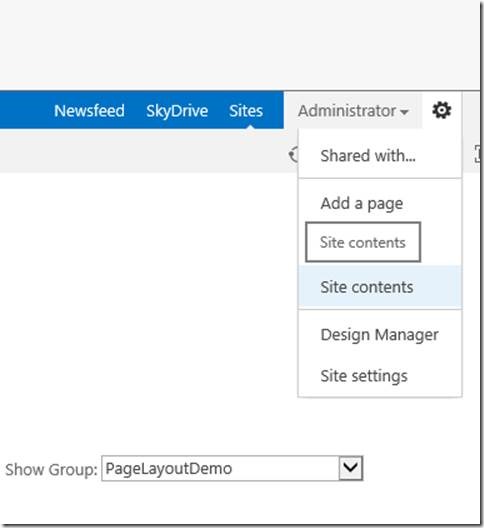
19. To verify, go to the Pages folder from the Site Contents.
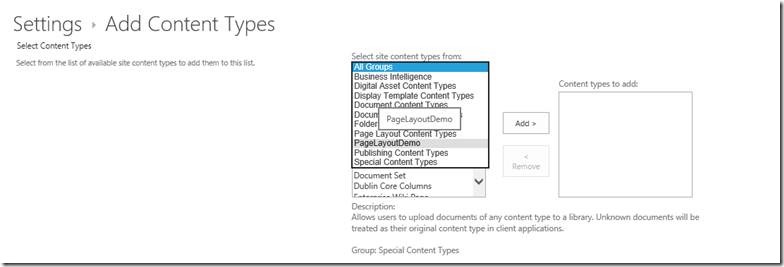
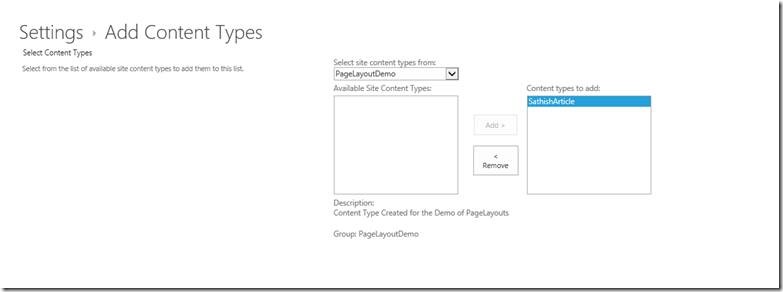
20. After this, we need to add the content type to the Pages List. Then only the content type will be listed under New Document
22. To add that, follow the screen shots.
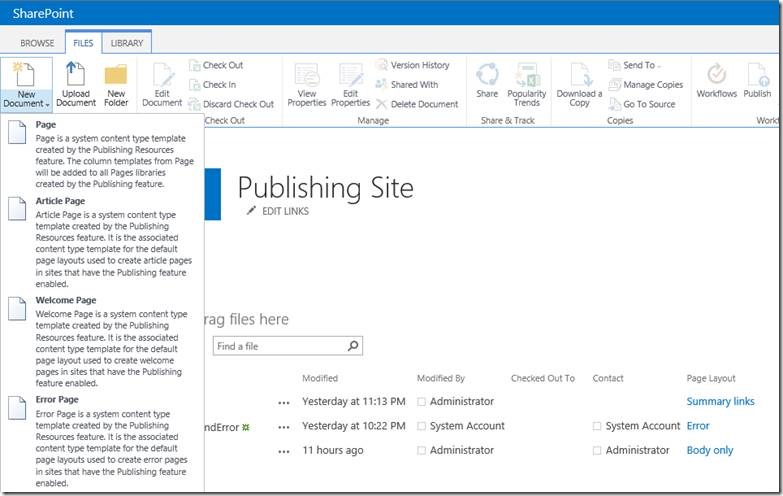
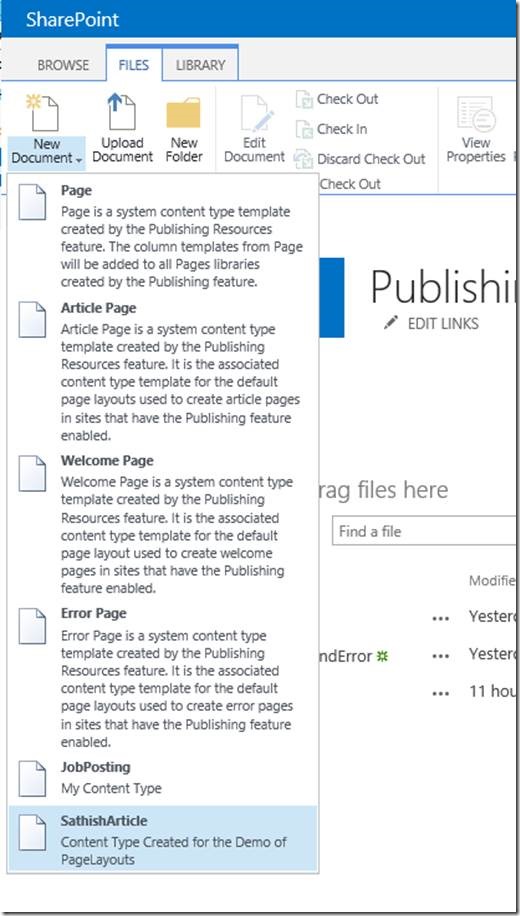
23. Now, if we come back to pages and click the New Document.
Out Content Type will be listed.
24. Click on it to create a new document.
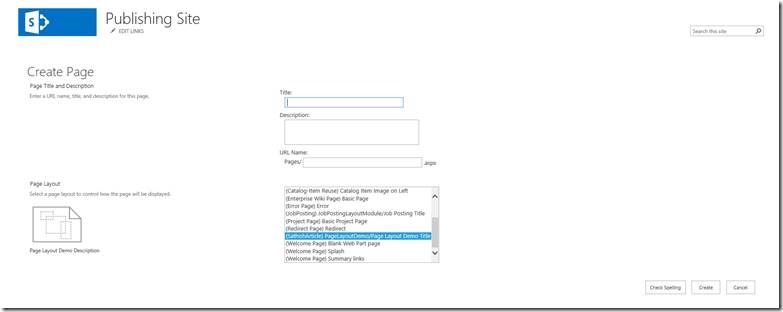
25. Wow… Our PageLayout will be listed on the Listbox. Select that and by giving a title, description, url, click create. In my case, I am giving as Article.
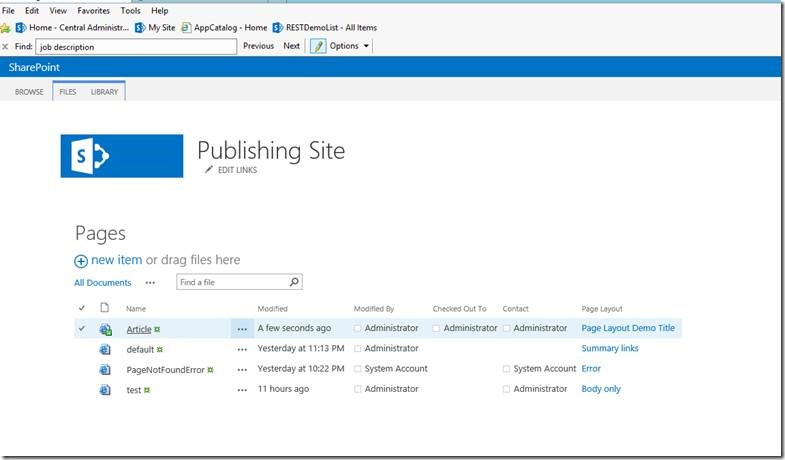
26. Article page will be listed as follows.
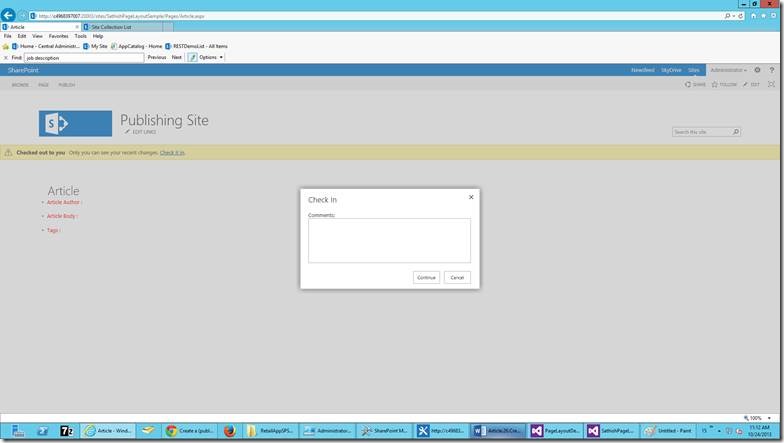
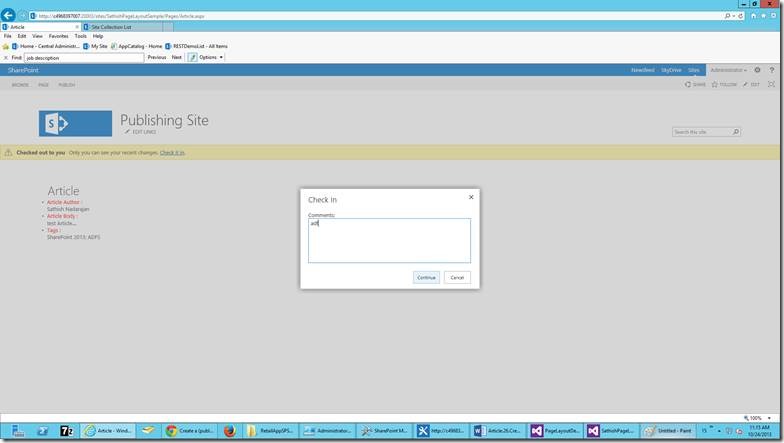
27. After that, we need to Check in and Publish the page. Then only this page will be visible to other users. Until then, this will only be visible to the user who created this.
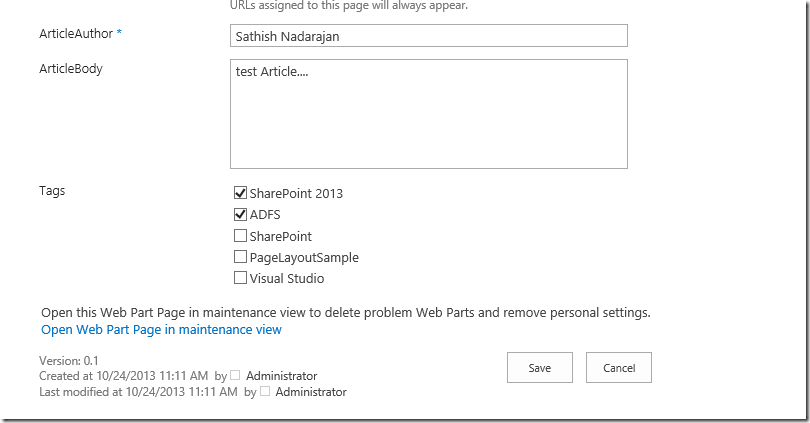
While checkin, it will prompt us to fill the mandatory fields. Since, we gave the ArticleAuthor field as a mandatory one, we need to fill those details.
Let me fill all the three fields, which we gave.
After giving those details, click Save.
Now, the system will allow us to checkin.
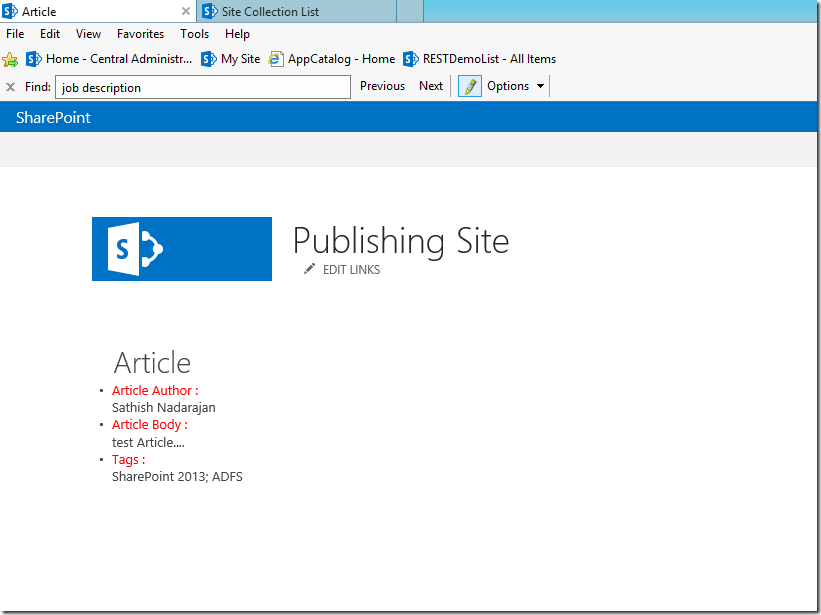
After checkin the page will looks like as below.
Here is our Page based on our custom Page Layout is ready.
Thought of explaining the pagelayout.aspx here. But since, it is becoming too lengthy, am planning to describe them on the next article.
Happy Coding.
Sathish Nadarajan.






Leave a comment