In the earlier article, we saw how to create a high trust Provider Hosted App Long time back. Now, let us see how to create a Low trust Provider Hosted App for Office 365, in fact Office 365 accepts only Low Trust Apps alone and Host the App web in Azure WebSite.
The Pre-requires are as follows.
1. Office 365 Subscription
2. Azure subscription
3. Visual Studio 2015 (Professional/Community/Enterprise Edition)
With the pre-requisites ready, let us start with step by step
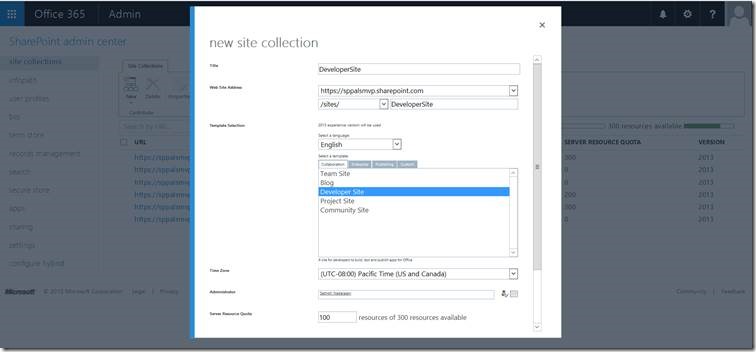
1. Login to the Office 365 and Create a Developer Site.
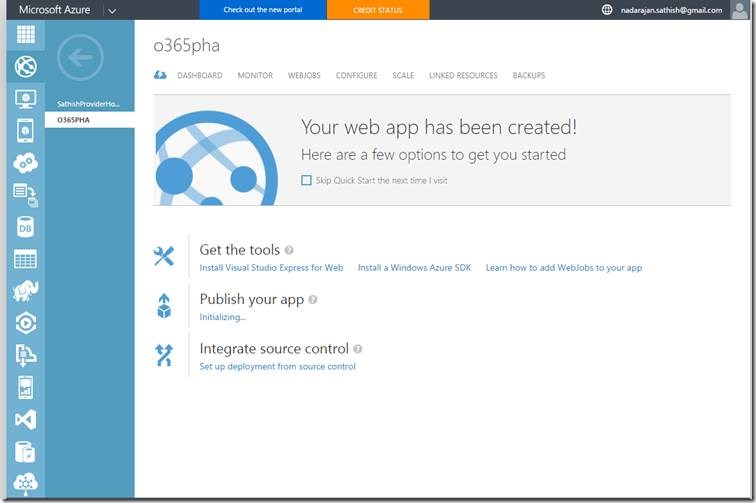
2. Login to Azure and Create a Web Application. To Create a Web Application, please REFER THE LINK HERE
3. In our case, I have created the Web Application Name as “O365PHA”
4. The URL will be http://o365pha.azurewebsites.net
5. Now, come back to the O365 Site. i.e., the Developer site, which we created.
6. Open the Page, https://****.sharepoint.com/sites/DeveloperSite/_layouts/15/appregnew.aspx
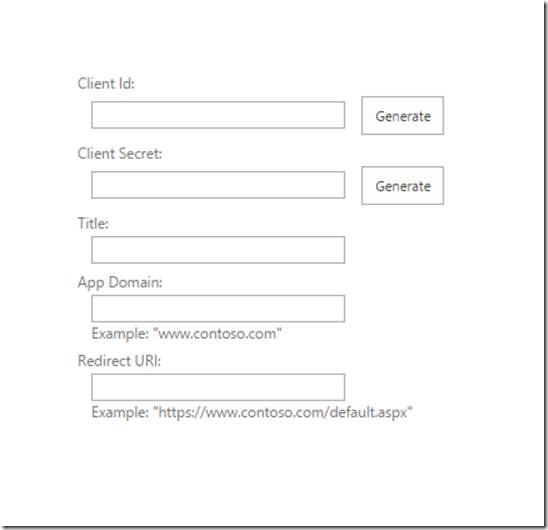
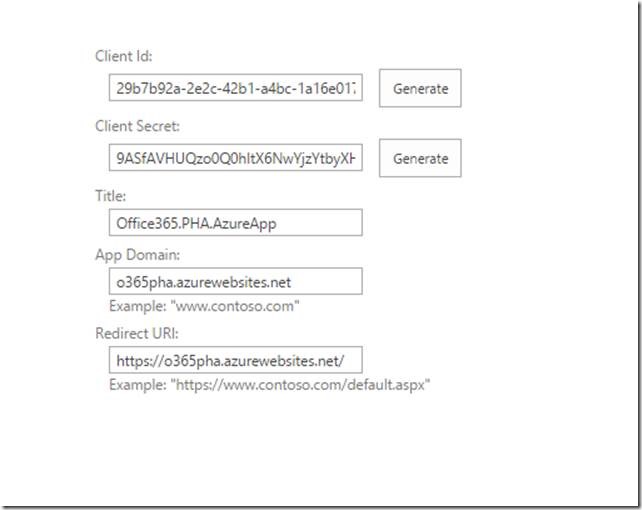
7. Generate the ClientID and Client Secret ID. Give the Title, AppDomain and Redirect URI as below.
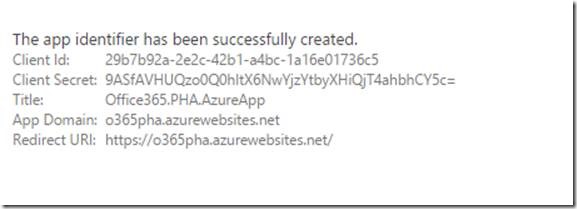
8. Click on Create.
9. Copy the Information (Client ID, Client Secret ID etc., in a NotePad)
10. Now, open the Visual Studio 2015.
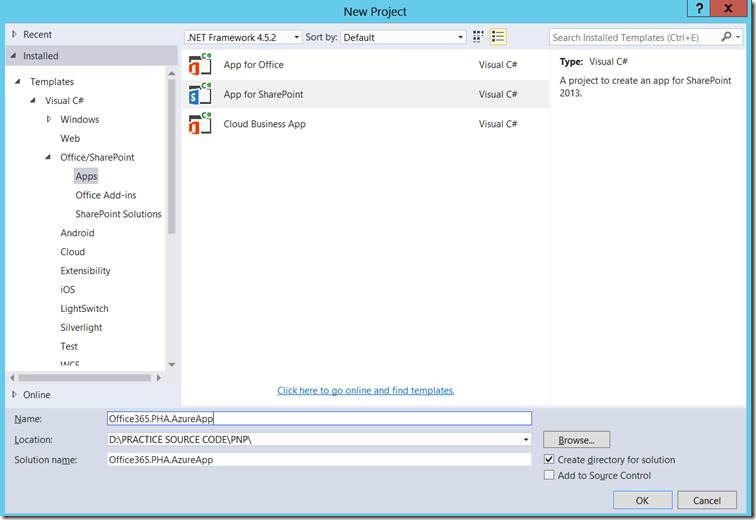
11. Create a New Project.
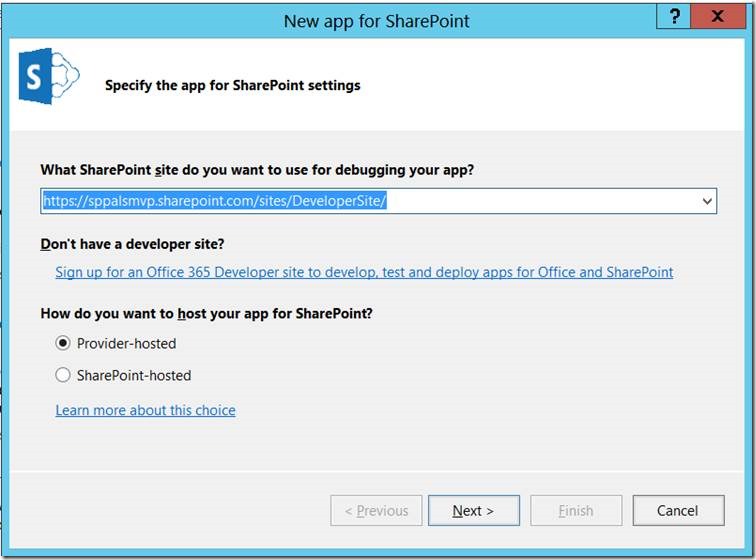
12. Enter the Developer Site URL and Select Provider Hosted App.
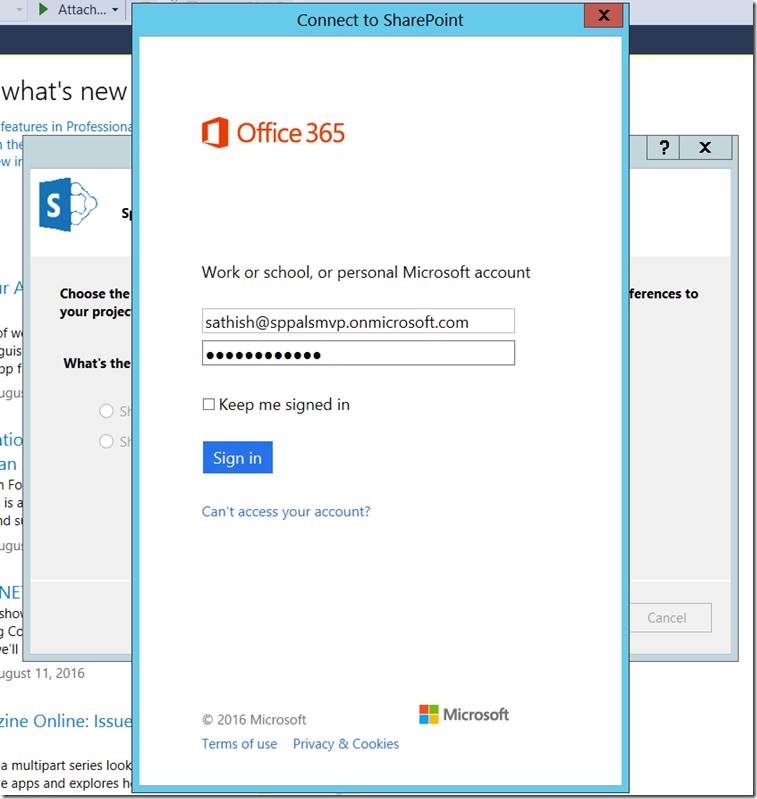
13. On Click of Next, the Credentials Window will be popup. Enter the Credentials.
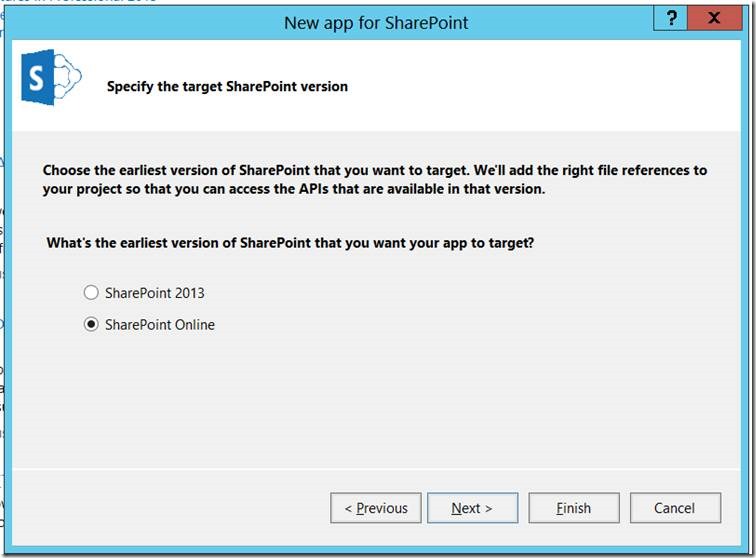
14. Once, login, the below window will appear. Select SharePoint Online on it.
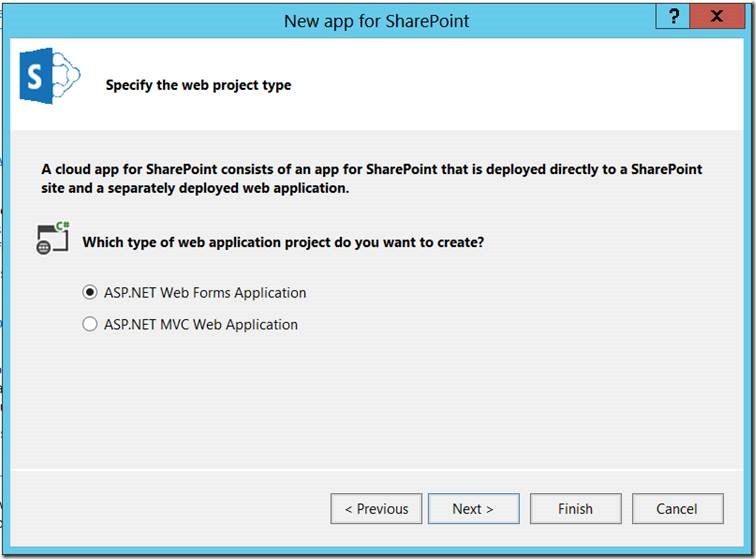
15. Choose the WebProject Type based on our requirement.
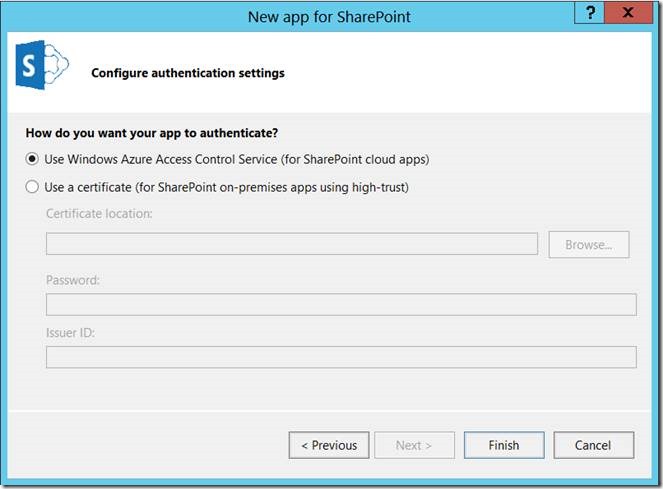
16. Select the Authentication Settings. Use the Windows Azure Access. Because Office 365 can only be Low Trust. Using Certificate is a high trust App.
17. Project will be Created.
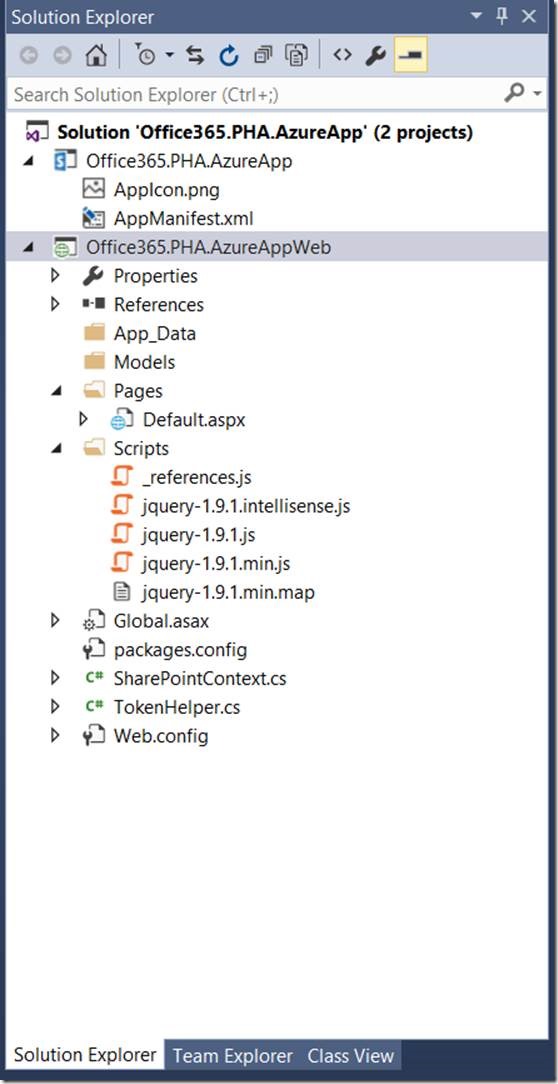
18. Once, the project Created, the solution structure will be as follows.
19. Open the Web.Config and Update the ClientID and Client Secret with the Values which we created in the earlier steps.
20. Update the AppManifest.XML as below.
 <?xml version="1.0" encoding="utf-8" ?>
 <!--Created:cb85b80c-f585-40ff-8bfc-12ff4d0e34a9-->
 <App xmlns="http://schemas.microsoft.com/sharepoint/2012/app/manifest"
      Name="Office365PHAAzureApp"
      ProductID="{35f05212-44de-4a8a-b3b7-66cdbfff2485}"
      Version="1.0.0.0"
      SharePointMinVersion="16.0.0.0"
 >
   <Properties>
     <Title>Office365.PHA.AzureApp</Title>
     <StartPage>~remoteAppUrl/Pages/Default.aspx?{StandardTokens}</StartPage>
   </Properties>

   <AppPrincipal>
     <RemoteWebApplication ClientId="29b7b92a-2e2c-42b1-a4bc-1a16e01736c5" />
   </AppPrincipal>

   <AppPermissionRequests AllowAppOnlyPolicy="false">
     <AppPermissionRequest Scope="http://sharepoint/content/sitecollection/web" Right="FullControl" />
   </AppPermissionRequests>

 </App>
21. Now, we are done with the steps. We need to publish the AppWeb to the Azure Web App Created.
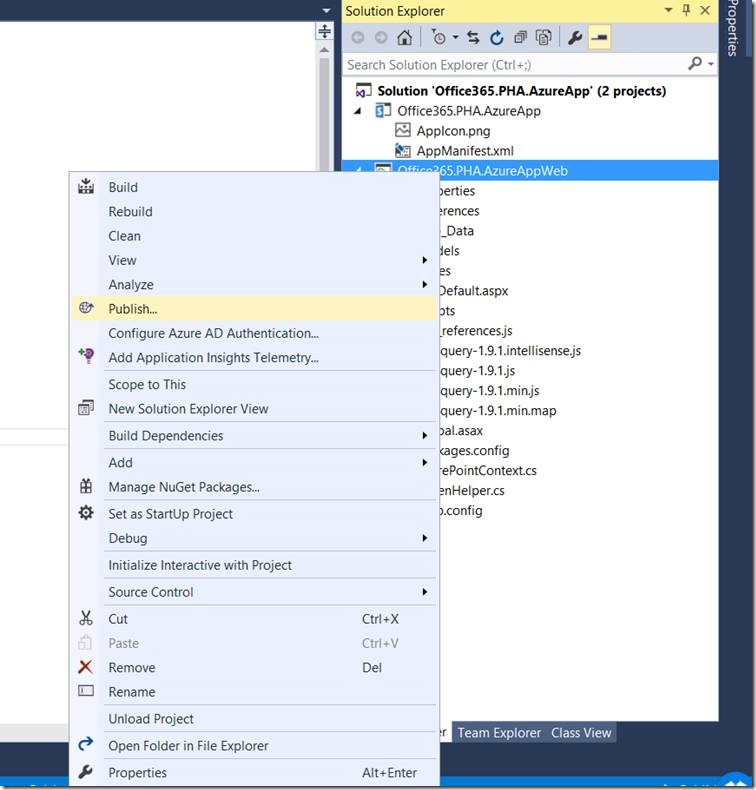
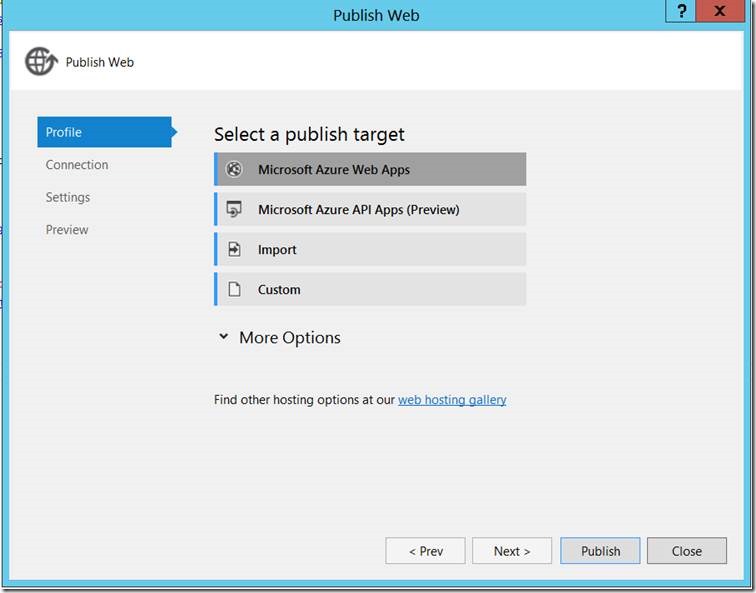
22. Right Click on the AppWeb Project. Click on Publish.
23. Click on “Microsoft Azure App Web”
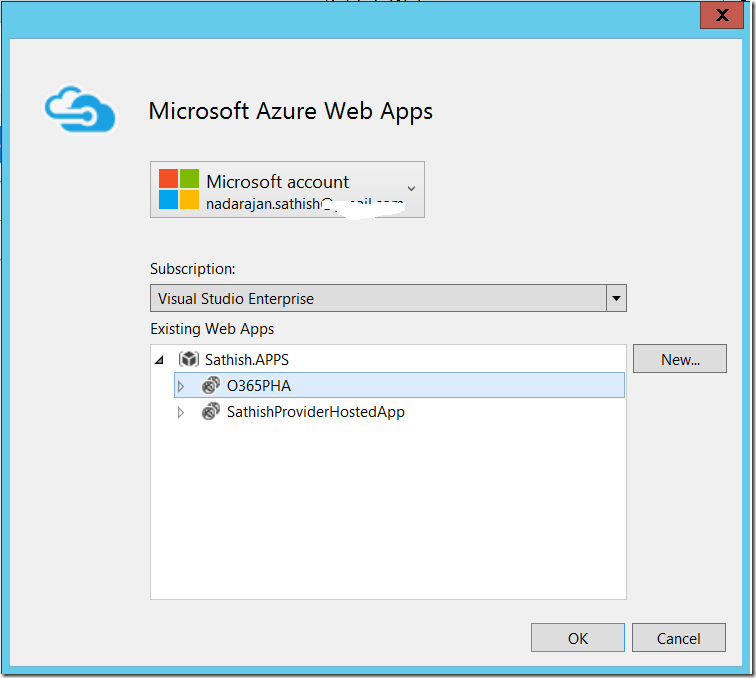
24. On the next Screen, Login to the Azure account and select the WebAPP which we created.
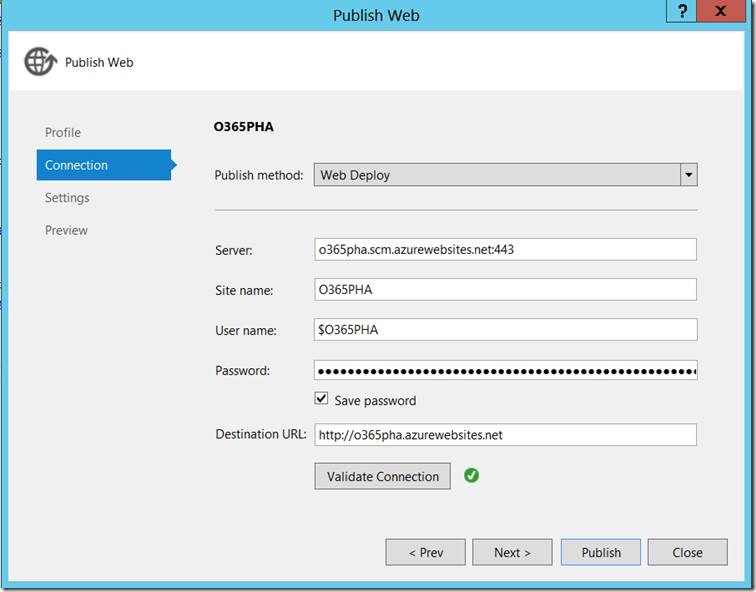
25. On Click OK, the publishing Profile will be automatically downloaded and populated.
26. Validate Connection – After getting the Success, Click on Next.
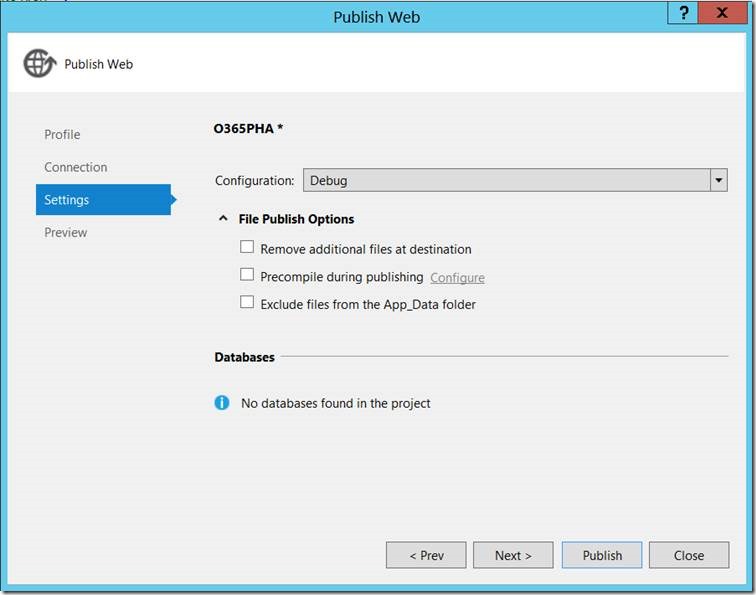
27. On the next screen, I am selecting Debug option. In later we are going to see, how to debug the AppWeb Also. But not in this article.
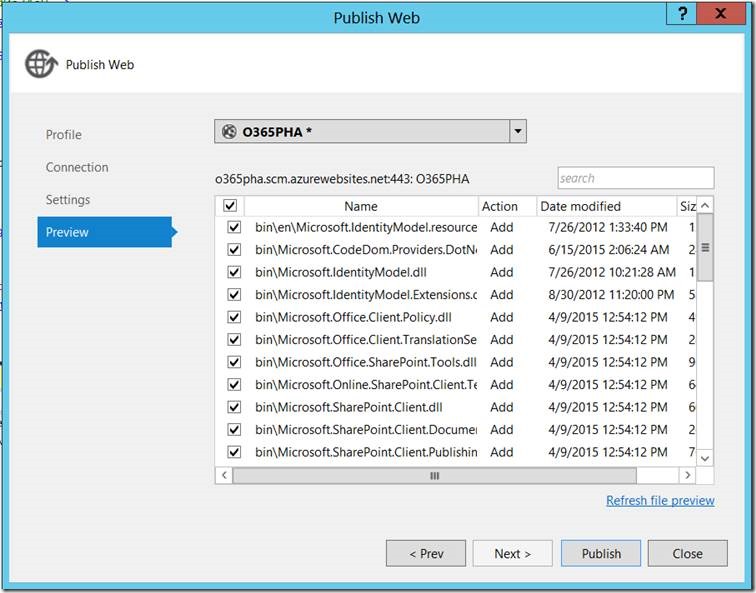
28. After the Start Preview, the list of files, which are going to be deployed is shown as below.
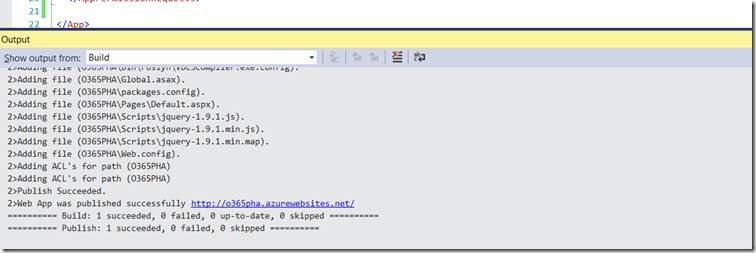
29. Click on Publish. We are done. Successfully published.
30. Now, go back to Azure Web Site and make the Configuration Changes.
31. Click on Configure Tab.
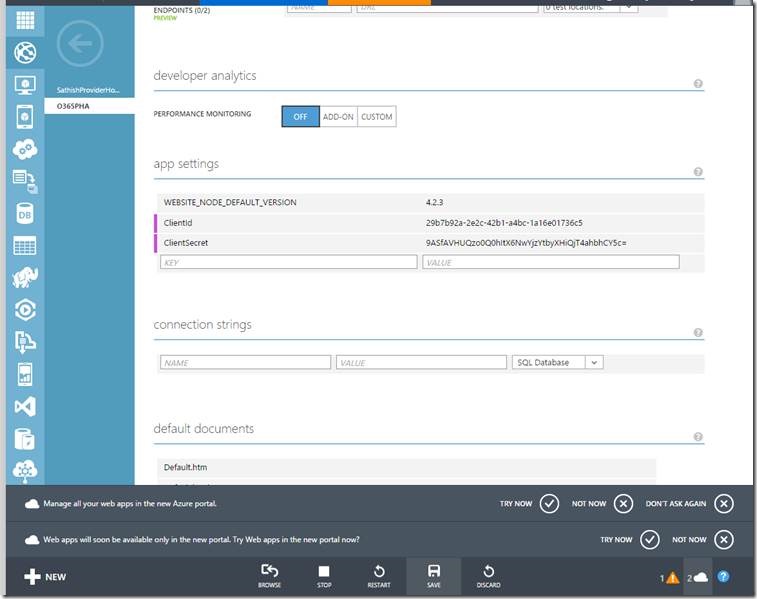
32. Scroll down and Enter the AppSettings as shown below.
33. Click on Save at the Bottom.
34. Now, we will publish the APP project into SharePoint Office 365.
35. Let us publish the APP Project to the File system and upload the same to AppCatalog Site. To know more about the creation of AppCatalog Site, REFER HERE.
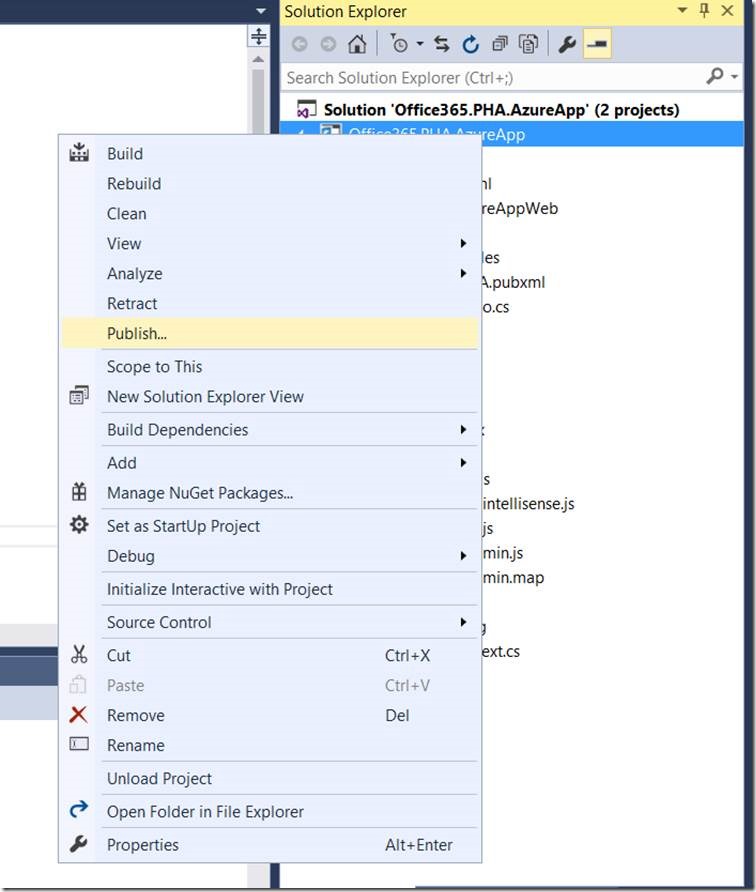
36. Now, coming back to Visual Studio. Right Click on the APP Project. Click on Publish.
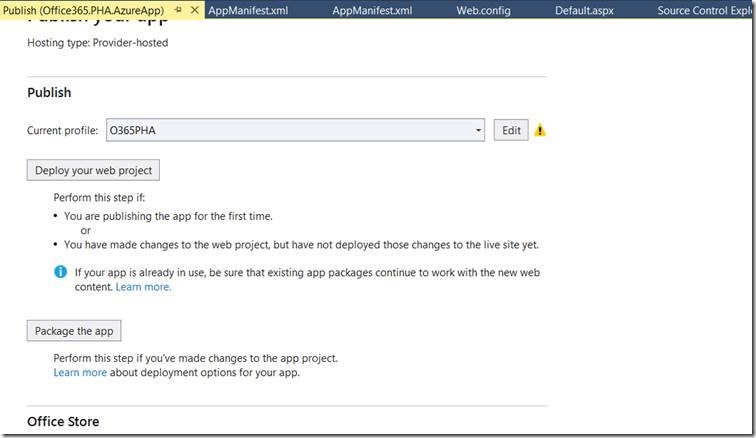
37. The Publish Screen will appear as below.
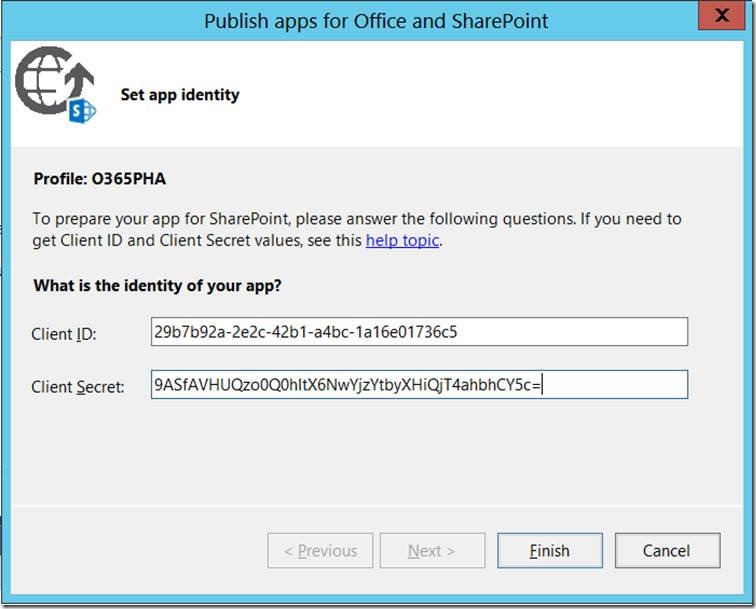
38. On the Current Profile, there is a warning Symbol. Click on Edit and Enter the Client ID and Client Secret Properly.
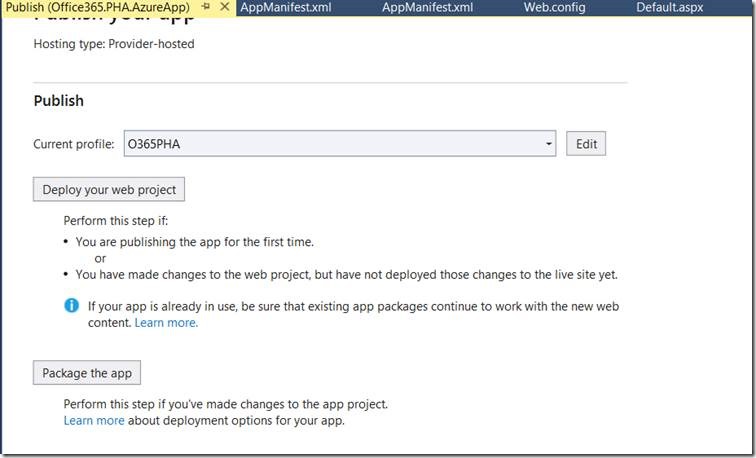
39. Now, the Warning symbol has gone.
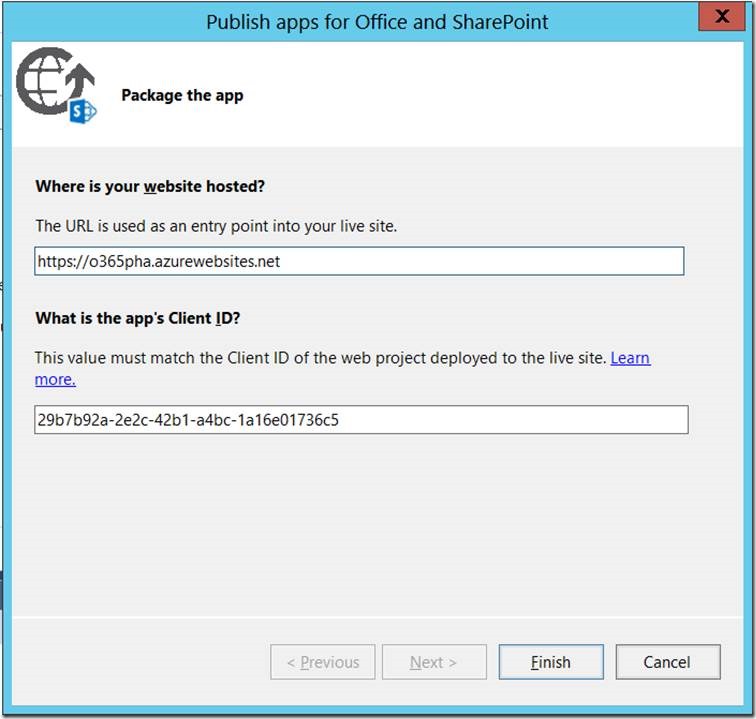
40. Click on “Package the app” and Enter the URL with HTTPS and the Client ID.
41. App is successfully packaged.
42. We will get the .APP File in the bin\debug\app.publish\version\ Folder.
43. Upload the APP file into AppCatalog Site Manually.
44. In My Case, the AppCatalog Site is something like https://sppalsmvp.sharepoint.com/sites/AppCatalog/
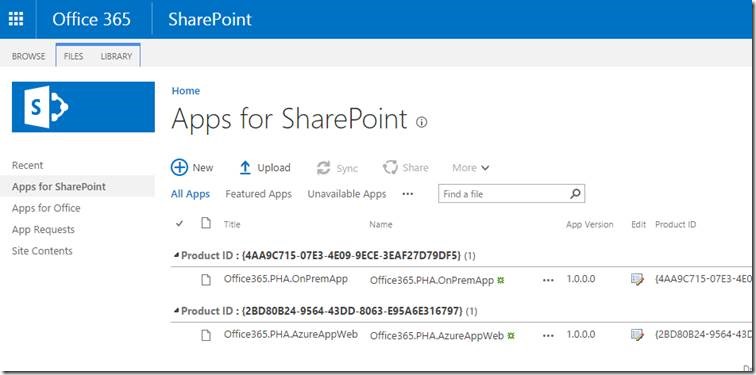
45. Go to “Apps for SharePoint” List.
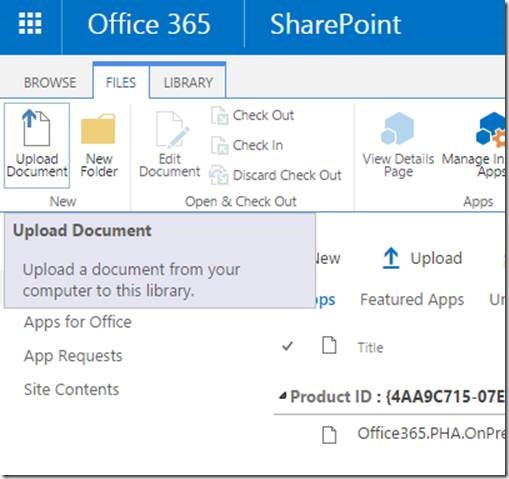
46. Upload the new APP File here.
47. The AppLoaded APP will be something as below.
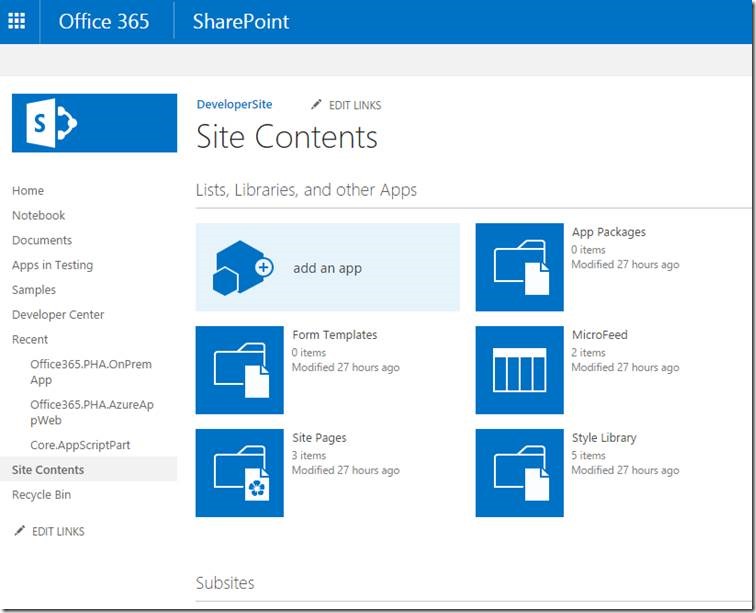
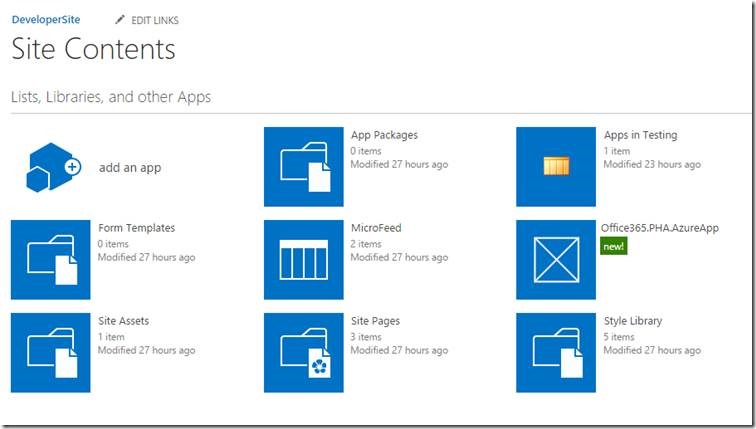
48. Now, come back to our Developer Site. Go to “Site Contents”
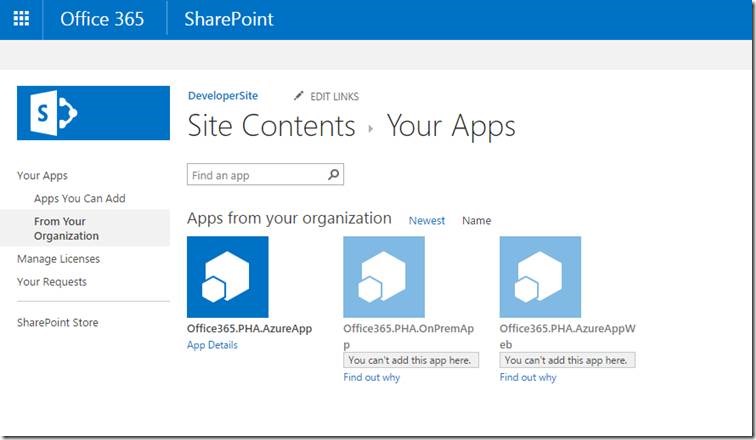
49. Click on “Add an APP”.
50. Add the “APP from your Orgnization”
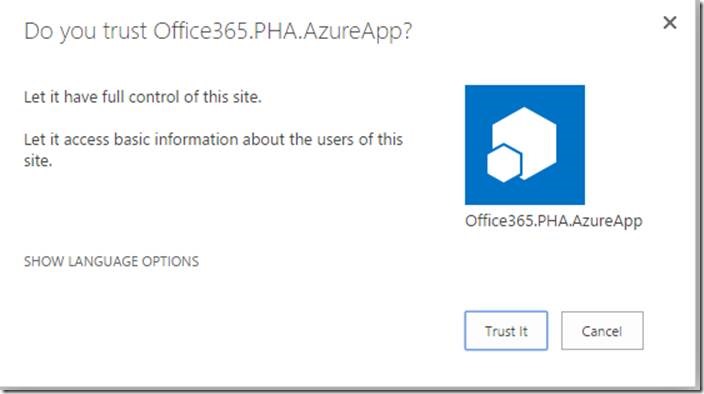
51. Trust The App.
52. The App will be listed on the ViewLsts.aspx
53. Launch the App. We will get the App Launched.
54. The Name of the Site is displayed.
Though it is a bit very lengthy, but I wanted to cover this topic in detail as much as I can.
Happy Coding,
Sathish Nadarajan.






Leave a comment