This article explains about how to create an Addin Project for Visual Studio 2012, add our Addin into the Tools Menu, On the Click, and execute the Exec method to attach with my w3wp Process mentioned on a configuration file.
In most of the time, being a developer, we will be attaching to the W3WP Process. The steps involved in Attaching are
1. Go to Tools Menu
2. Click Attach to Process
3. Select the process from a list of process. Even it is tedious to identify which process is ours. Usually all the developers will be attaching to all the W3WP Process. To identify the correct w3wp Process, already we had seen about that here.
4. Since, we are attaching more than one process, visual studio will take some time to load all the symbols for all the processes attached.
5. In the same manner, there are n number of popups will be coming before attachment completes.
All these steps are OK when we are doing once in a while. But being a developer, we cannot live without attaching the process frequently.
Hence, got an idea to create an Addin, by clicking on it, we need to attach to a particular process, on which our application pool runs. Let us see, step by step to create an Addin Project using Visual Studio 2012.
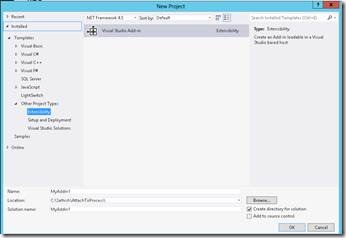
1. Open the Visual Studio and select New Project.
2. Select the Visual Studio Add-in Template.
3. Add-in Wizard will be as follows.
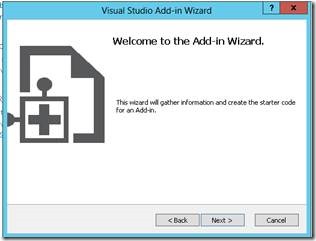
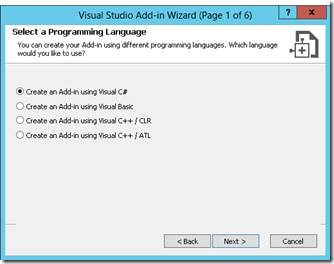
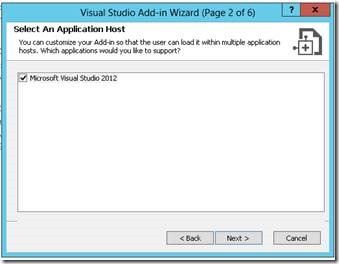
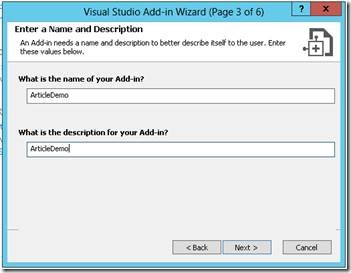
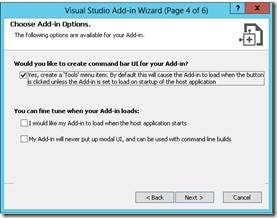
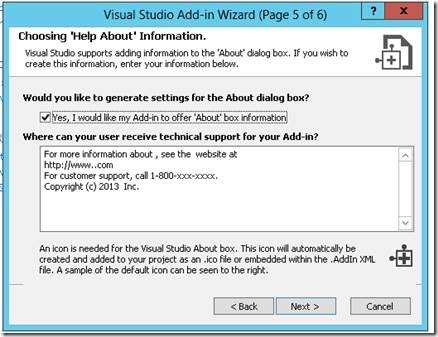
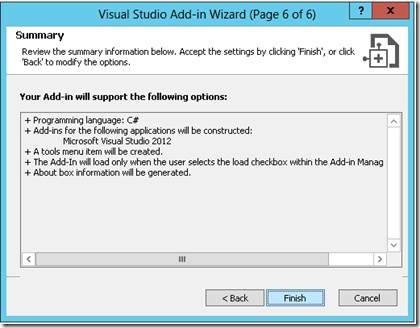
4. Now, the Add-in Project Created successfully. The structure of the solution will be as follows.
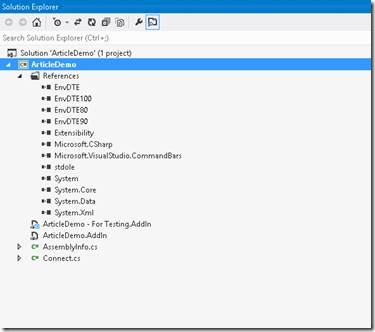
5. On the solution, the most important class is the Connect.cs and we will be working only with that class alone. We don’t have to do anything with the other files.
6. The references, will be having some COM components referred. These COM components are nothing but, the DLLs used to create the visual studio itself.
7. Now, let us open the Connect.cs file. Since, by the time of Project Creation itself, we declared that, the Add-in should appear on the Tools Menu, the below code has been generated by default. The code is self-explanatory and this method OnConnection will get executed when the Add-in gets loaded with the Visual Studio.
public void OnConnection(object application, ext_ConnectMode connectMode, object addInInst, ref Array custom) { _applicationObject = (DTE2)application; _addInInstance = (AddIn)addInInst; if(connectMode == ext_ConnectMode.ext_cm_UISetup) { object []contextGUIDS = new object[] { }; Commands2 commands = (Commands2)_applicationObject.Commands; string toolsMenuName = "Tools"; //Place the command on the tools menu. //Find the MenuBar command bar, which is the top-level command bar holding all the main menu items: Microsoft.VisualStudio.CommandBars.CommandBar menuBarCommandBar = ((Microsoft.VisualStudio.CommandBars.CommandBars)_applicationObject.CommandBars)["MenuBar"]; //Find the Tools command bar on the MenuBar command bar: CommandBarControl toolsControl = menuBarCommandBar.Controls[toolsMenuName]; CommandBarPopup toolsPopup = (CommandBarPopup)toolsControl; //This try/catch block can be duplicated if you wish to add multiple commands to be handled by your Add-in, // just make sure you also update the QueryStatus/Exec method to include the new command names. try { //Add a command to the Commands collection: Command command = commands.AddNamedCommand2(_addInInstance, "ArticleDemo", "ArticleDemo", "Executes the command for ArticleDemo", true, 59, ref contextGUIDS, (int)vsCommandStatus.vsCommandStatusSupported+(int)vsCommandStatus.vsCommandStatusEnabled, (int)vsCommandStyle.vsCommandStylePictAndText, vsCommandControlType.vsCommandControlTypeButton); //Add a control for the command to the tools menu: if((command != null) && (toolsPopup != null)) { command.AddControl(toolsPopup.CommandBar, 1); } } catch(System.ArgumentException) { //If we are here, then the exception is probably because a command with that name // already exists. If so there is no need to recreate the command and we can // safely ignore the exception. } } }
|
8. Now, we can build the solution and run this by pressing F5.
9. A new instance of Visual Studio will get opened.
10. On the new instance, if you look under the Tools Menu, we can find our Add-in listed as a submenu.
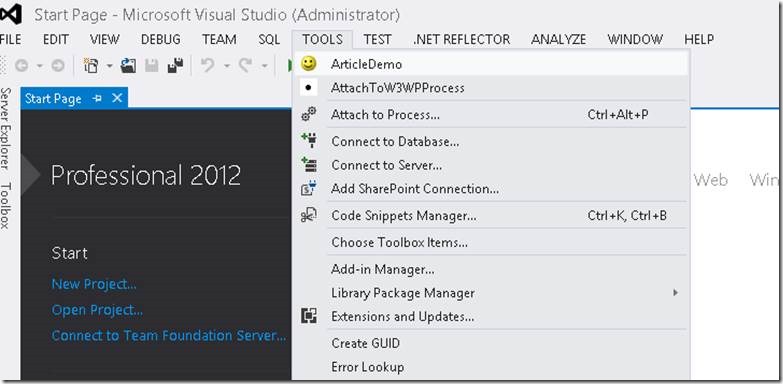
11. The default smiley image is given by Visual Studio. To change that with our custom image, the image size should be 16×16 bmp image.
12. We can add a resource file and Add an image with a size, 16×16 to that resource file and a small change needs to be made on the OnConnection method.
13. Let us add the Resource File First.
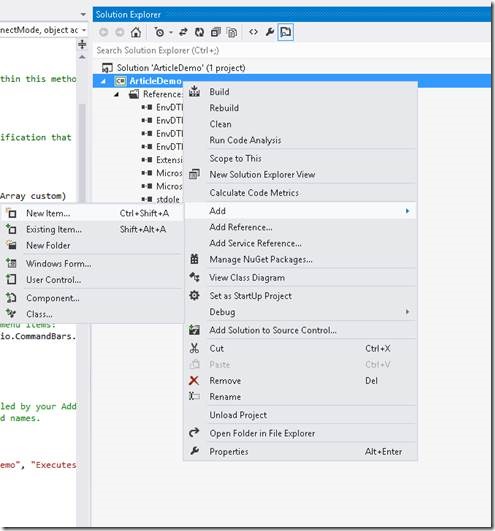
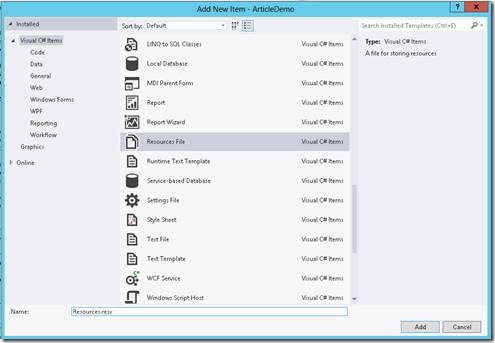
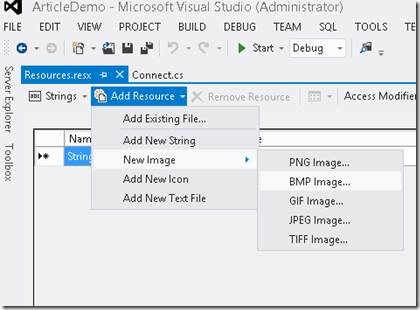
Either we can add a new image, or an Existing file. I added my Existing File and Named the file as 1.bmp.
Now, coming back to the OnConnection Method.
Command command = commands.AddNamedCommand2(_addInInstance, "ArticleDemo", "ArticleDemo", "Executes the command for ArticleDemo", true, 59, ref contextGUIDS, (int)vsCommandStatus.vsCommandStatusSupported+(int)vsCommandStatus.vsCommandStatusEnabled, (int)vsCommandStyle.vsCommandStylePictAndText, vsCommandControlType.vsCommandControlTypeButton);
Modify the above code as
Command command = commands.AddNamedCommand2(_addInInstance, "ArticleDemo", "ArticleDemo", "Executes the command for ArticleDemo", false, 1, ref contextGUIDS, (int)vsCommandStatus.vsCommandStatusSupported+(int)vsCommandStatus.vsCommandStatusEnabled, (int)vsCommandStyle.vsCommandStylePictAndText, vsCommandControlType.vsCommandControlTypeButton);
|
The value true, which is highlighted is a Boolean to take from the default visual studio images and the 59 is nothing but the number of the image.
We are modifying the true to false and make the image to take from our resource file. The file name is 1. (Resources.resx).
With that, we can modify the image.
Now, let us come back to our actual functionality. Whenever, the Menu Item has been clicked, the “Exec” method gets executed. By default, the method will looks like
public void Exec(string commandName, vsCommandExecOption executeOption, ref object varIn, ref object varOut, ref bool handled) { handled = false; if(executeOption == vsCommandExecOption.vsCommandExecOptionDoDefault) { if(commandName == "ArticleDemo.Connect.ArticleDemo") { handled = true; return; } } }
|
We need to write, whatever we want, in the last if statement.
Let me modify the Exec command as follows.
public void Exec(string commandName, vsCommandExecOption executeOption, ref object varIn, ref object varOut, ref bool handled) { try { int ProcessID = GetProcessID(); handled = false; if (executeOption == vsCommandExecOption.vsCommandExecOptionDoDefault) { if (commandName == "AttachToW3WPProcess.Connect.AttachToW3WPProcess") { handled = true; foreach (EnvDTE.Process item in _applicationObject.Debugger.LocalProcesses) { if (item.ProcessID == ProcessID) { item.Attach(); } } return; } } } catch (Exception) { throw; } } // This method is used to return the ProcessID of the AppPool mentioned on the ProcessName.txt. The filename should not be changed. And as mentioned on the deployment instruction, the txt file needs to be placed on the IDE folder. private int GetProcessID() { // string ProcessName = System.Configuration.ConfigurationSettings.AppSettings["ProcessName"]; string ProcessName = System.IO.File.ReadAllText(@".ProcessName.txt").Trim(); int ProcessID = 0; ProcessStartInfo info = new ProcessStartInfo("C:\Windows\System32\inetsrv\appcmd.exe", "list wp"); info.RedirectStandardOutput = true; info.UseShellExecute = false; System.Diagnostics.Process p = System.Diagnostics.Process.Start(info); p.Start(); string ProcessList = p.StandardOutput.ReadToEnd(); if (ProcessList.Contains(ProcessName)) { char[] delimiters = new char[] { 'r', 'n' }; string[] Processes = ProcessList.Split(delimiters, StringSplitOptions.RemoveEmptyEntries); for (int i = 0; i < Processes.Length; i++) { if (Processes[i].Contains(ProcessName)) { char[] delimiters1 = new char[] { '"' }; string[] Process = Processes[i].Split(delimiters1, StringSplitOptions.RemoveEmptyEntries); ProcessID = Convert.ToInt32(Process[1].Trim()); break; } } } return ProcessID; }
|
To get our ProcessID based on the AppPool Name, we need to create a Text file called ProcessName.txt and place the text file in the location “C:\Program Files (x86)\Microsoft Visual Studio 11.0\Common7\IDE”. This is because, we cannot set this value in the app.config or any other resource files. Since, the resource files will be in binary, can’t be edited and the app.config refers to the current solution.
Hence, we need to place the ProcessName.txt in a common location, from where the visual studio can pick using a relation.
That’s it. We can build the solution and deploy. The code is self-explanatory. Once, we complete the development, the delivery of this Add-in is very simple.
Delivering Add-in to another machines.
1. Copy the Addin and dll file.
2. Paste it on the MyDocuments/VisualStudio 2012/Addins/
3. Copy the ProcessName.txt on the above mentioned location. Ready to go. Now, open a new instance of Visual Studio, you will see the Menu and on click, it will get attached with the mentioned process.
Download the Source from here.


Leave a comment